Learn@Illinois Moodle - Using UI Smart Import
Learn how to use the UI Smart Import feature. This is a tool that helps catch errors in files that will be uploaded to Moodle. The following is a basic guide for using this feature.
For a permanent link to this information, please use: http://go.illinois.edu/MoodleUISmartImport
- In your upload file (spreadsheet), name the NetID column "NetID". This tells the Smart Import what field it is and lets it check to verify all of the students are enrolled and have correct NetIDs.
- Save the file as a CSV.
- On your course homepage, click the Grades tab.

- Click the drop-down menu which reads "Grader report" and select the Import option.
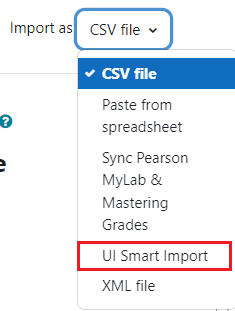
- Expand the drop-down menu that reads "CSV file" and select UI Smart Import.
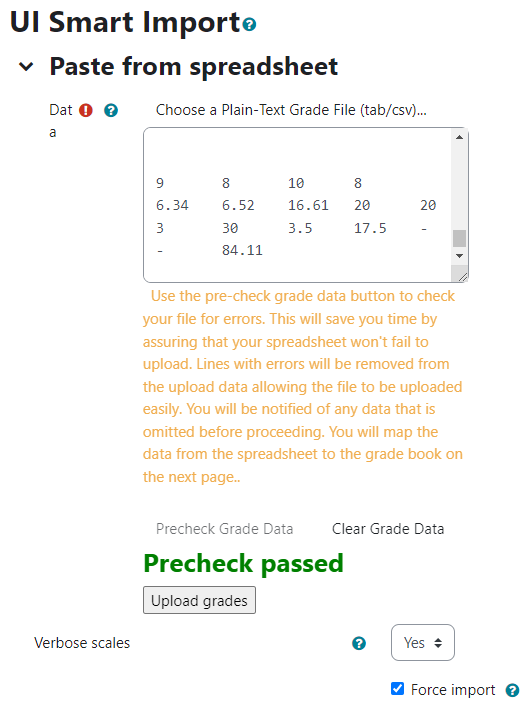
- Click on Choose a Plain-Text Grade File (tab/csv)... and upload your grade file.
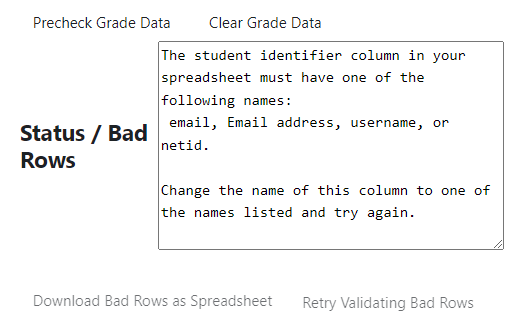
- Moodle will spend some time processing the file. When it is finished, a box will pop up below that will report whether the file is okay ("Precheck passed") or list any "Bad Rows".

OR

Note: The bad rows are automatically removed from the grade file. If you need to edit a NetID and put it back in, you can edit it, then copy/paste it into the box above. This will initiate a new Precheck to make sure the data file is now okay.
-
- When you're ready, click Upload grades. This will process the file.
- On the next page, use the following settings:
- In the "Identify user by" section:
- Under "Map from", select NetID
- Under "Map to", select Username
- In the "Grade item mappings" section:
- Under "NetID", select Ignore
- Under the name of your assignment (the name of the Excel column in your file), select the name of the grade item in Moodle that you want to import to.
- In the "Identify user by" section:
- Click the Upload grades button. The page will continue to look like it's loading as it processes the file.
- When the upload is complete, go to "Single view" to verify that the grades have been uploaded correctly. (See steps 1-4 in this link for instructions on how to access Single View.)
- When you're ready, click Upload grades. This will process the file.


