EWS Labs, Installing Optional Software
The Engineering Workstation (EWS) software library is expansive to support the various different programs within the College of Engineering. However, to keep loading times down and avoid running into storage limitations, some common software is not pre-installed and can instead be installed on-demand when it is needed. We refer to this as EWS Optional Software.
Optional software typically includes applications that support academic coursework, but may not be used on a daily basis (for example, Adobe Photoshop). Various optional software titles are available on every EWS computer, though certain titles may only be available in certain labs, depending on where they are most needed. Instructors may request specific titles to made available in specific labs by using our software request form, linked on our Instructor Checklist article.
Linux software
This article is specific to EWS Windows computers. For information about optional software on EWS Linux computers, see this page.
Important Note
Before installing optional software using the below instructions, please be aware: Once you have started an optional software install, you must stay logged into the computer for the entire duration of the installation. Do not start an install and then log out before confirming the installation is complete, or the software may end up in a broken state and may require administrative intervention before it can be used.
Note that several available software titles can take a long time to install. It is not uncommon for some large complex engineering apps such as ANSYS, Solidworks, etc. to take an hour or so to fully install.
Viewing available optional software
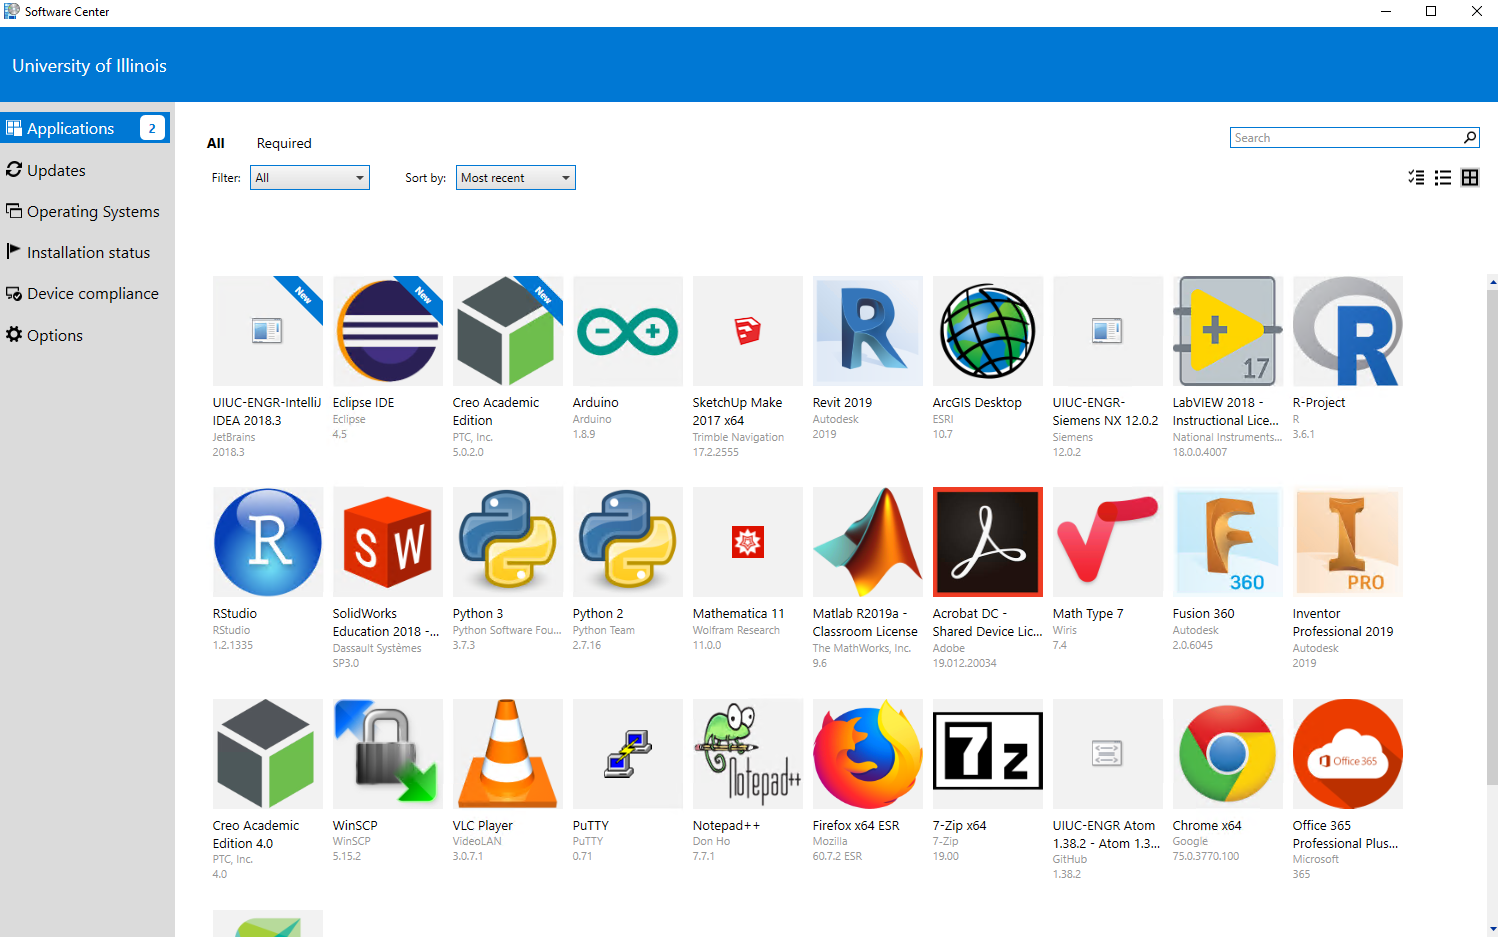
To view the list of optional software that is available to install (or already installed), you must be logged into an EWS Windows computer. These are typically distinguished by the "Engineering Workstation Laboratory" background on the login screen. Once you are logged in, locate the "Software Center" icon either on the desktop or in the Start Menu.

After opening the Software Center, you will be presented with an application catalog. This catalog includes both software that is available to install, and software that has already been installed on the computer. To get more information on a particular software title, you can click the icon or name for details.
Installing optional software
To install a particular software title from the Software Center, begin by selecting the icon or name from the "Applications" screen.
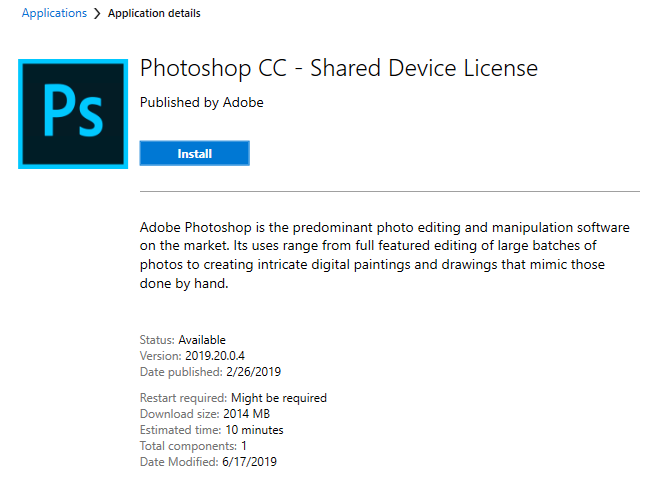
Next, click the blue "Install" button to install. The software will download and install; the page will update with the installation status as the installation progresses.
If the "install" button is missing and you instead see an "Installed" or "Uninstall" button, the software is already installed.
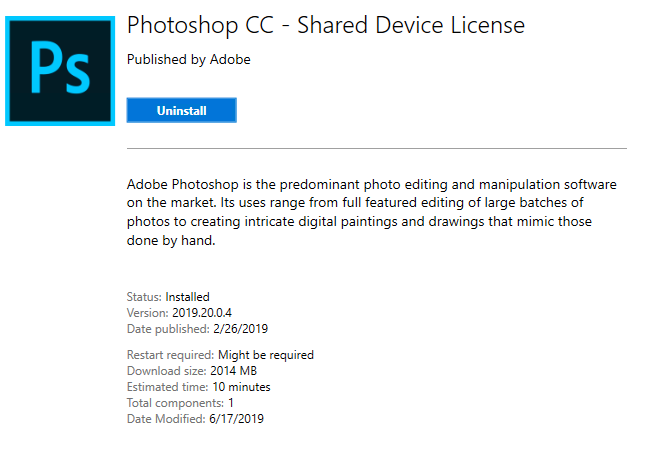
Once the software has finished installing, the blue "Install" button will change to either a grayed-out "Installed" button, or an "Uninstall" button.
If you have any problems installing optional software, please contact the EWS team at https://go.illinois.edu/ewshelp
Instructors and TAs only:
To request new software, please submit a form at http://go.illinois.edu/EWSSoftware