Topics Map > Learn@Illinois
Learn@Illinois Moodle - Using the Quiz Activity as a Lecture
For a permanent link to this information, please use: https://go.illinois.edu/MoodleQuizasLecture
Changing Security Settings
There are two security settings which are important to change when making a lecture using the quiz activity. It is important to make sure that security settings are set up properly so that students can easily view all slides and are not prevented from navigating to other parts of the course while they view the lecture.
Showing Blocks
Make sure that blocks can be viewed while students are viewing the lecture.
- Navigate to the quiz you would like to edit.
- At the top of the quiz page, click on the Settings tab.
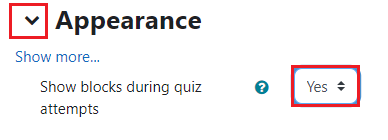
- Expand the Appearance section and for "Show blocks during quiz attempts," select Yes.
- At the bottom of the page, save your changes.
Lessening Browser Security
Make sure that students can view the rest of the course site while they are viewing the lecture.
- Navigate to the quiz you would like to edit.
- At the top of the quiz page, click on the Settings tab.
- Expand the Extra restrictions on attempts section and for "Browser security," select None.

- At the bottom of the page, save your changes.
Adjusting Timing Settings
- Navigate to the quiz you would like to edit.
- At the top of the quiz page, click on the Settings tab.
- Expand the Timing section, click the checkboxes to enable the quiz open/close dates and the time limit feature, and adjust these dates and times as needed.

- At the bottom of the page, save your changes.
Using the Question Bank
We always recommend creating your slides in the Question bank using categories for optimal organization. See Using the Question Bank for more information.
Using the Description Question Type
- Navigate to the quiz you would like to edit.
- At the top of the quiz page, click on the Questions tab.
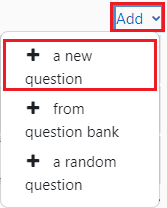
- To add a new question, expand Add and select the +a new question option.
- Under the "OTHER" section, select the Description question type (which allows you to add slides that do not have a question) and click the Add button.
- Note that you must have at least one actual question included in your quiz. If you don't want any questions in your lecture, it is possible to set up a dummy question at the end of the slides.
Creating Headings
Create headings so that students can skip back through the lecture and find sections they would like to review. See our help page Creating Headings in Quizzes.Allowing Multiple Attempts for Full Credit
- Navigate to the quiz you would like to edit.
- At the top of the quiz page, click on the Settings tab.
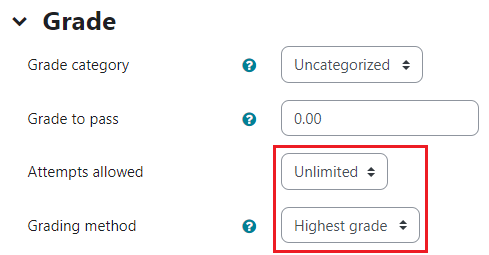
- Expand the Grade section and for the "Attempts allowed" drop-down menu, select Unlimited. For the "Grading method" drop-down menu, select Highest grade.
- At the bottom of the page, save your changes.
Allowing Students to Check Answers Immediately After Answering
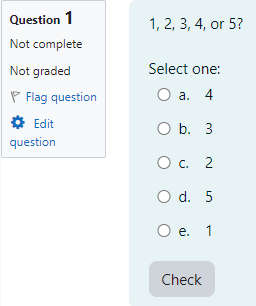
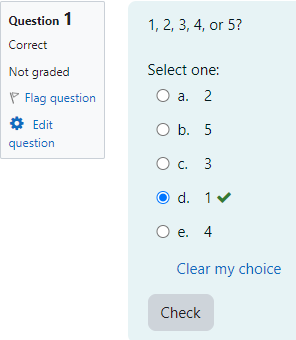
You may want to allow students to check their answers immediately instead of waiting until they finish the entire lecture. Using "Adaptive mode (no penalties)" allows students to click a Check button below question types (e.g., multiple choice) and check their answer immediately.
When students click "Check", their answer will be marked to indicate that it is either correct or incorrect.
- Navigate to the quiz you would like to edit.
- At the top of the quiz page, click on the Settings tab.
- Expand the Question behavior section and for the "How questions behave" drop-down menu, select Adaptive mode (no penalties).
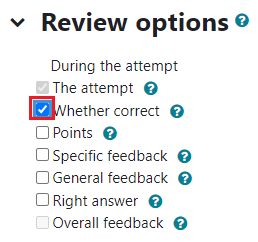
Note: Selecting "Adaptive mode (no penalties)" will override the percentage penalties which are selected under "Multiple tries" in individual quiz questions. - Next, expand the Review options section and under "During the attempt", ensure that the Whether correct checkbox is selected.
- At the bottom of the page, save your changes.

