
KB User's Guide - Assessment Tab - New Question
Note
The Assessment Tab is not enabled in the KB Admin Tools for groups that do not have any existing quiz/survey questions. If your group would like to use the Assessment Tab features, reach out to kb-team@doit.wisc.edu to have the tab activated.
How to Create a New Question
To get to the Creating a New Question screen, please go to the KB Admin Tools > Assessment tab > New Question link.
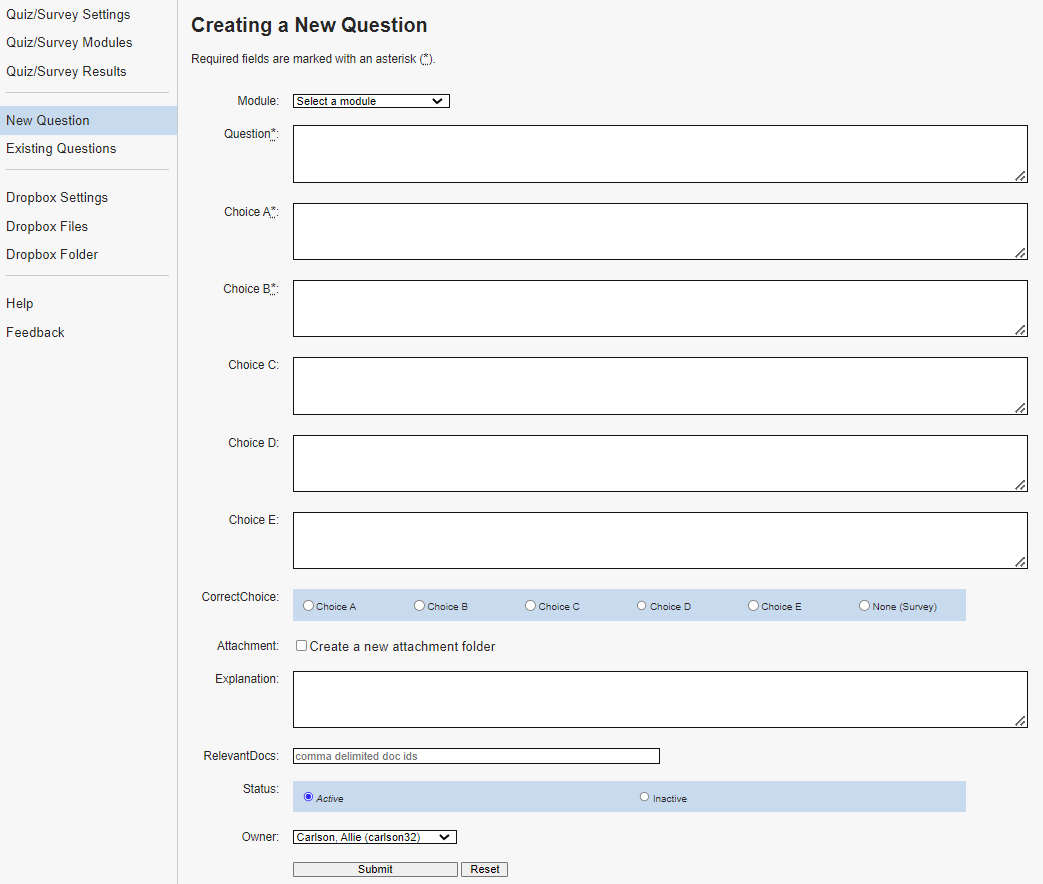
Description of Fields
- Module - Please know that you do not need to select a Module to create a New Question. Those who have not created Modules will see the option of "Select a Module" in the dropdown menu. Creating Modules will populate this dropdown menu.
If you have already created Modules and wish to designate your New Question to a specific Module, you may select it from the drop down menu. For more information on how to create a new Module or modify existing Modules, please refer to KB User's Guide - Assessment Tab - Quiz/Survey Modules.
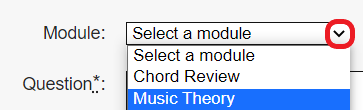
Those who have created Modules may click on the downward arrow to reveal their options. The image below shows two Modules to choose from, "Music Theory" is highlighted.
-
Question* - This is a required field as indicated by the asterisk. Enter your Question or statement here.
-
Choice A* - This is a required field as indicated by the asterisk. Enter your first selection.
-
Choice B* - This is a required field as indicated by the asterisk. Enter your second selection.
-
Choice C - Enter your third selection. (optional)
-
Choice D - Enter your fourth selection. (optional)
-
Choice E - Enter your fifth selection. (optional)
-
CorrectChoice - Select the appropriate radio button next to the correct choice. If you do not select a CorrectChoice because the Question you are creating does not require one, a pop up box will appear asking, "No CorrectChoice specified. Are you sure you want to continue?". Click on OK or Cancel as appropriate.

-
Attachment - You may create an attachment folder upon creation of a new Question, OR while modifying an existing Question. Attachments can be embedded in the following Question fields:
-
Question field
-
Choice A through E field(s)
-
and/or Explanation field(s).
-
-
Explanation - Enter text here to supplement the CorrectChoice selection.
-
RelevantDocs - Enter KB document ID or comma delimit multiple document IDs that support this Question.
-
Status - Select Active or Inactive. This question needs to be set to Active for users to see it on your live KB site.
-
Owner -The owner defaults to you, or you may select an owner from the drop down menu.
-
Submit button - Click this button to save your changes.
-
Reset button - Click this button to Reset the fields to blank. If you are editing an existing question, the Reset button will clear the data in the fields that have not been saved (by clicking Submit).
Attachment Folder
When you are initially creating a Question and intend to enter file attachment(s), check the box next to "Create a new attachment folder".
![]()
When you are done modifying your newly created Question, click on the Submit button to save your work. You may add attachments when you modify this Question. Find the Question in which you want to embed attachments on the Existing Questions list (Assessment tab > Existing Questions link) and click on the Edit button. Go to the Attachment section of the screen and click on the "Open question XXXX attachment folder". The image below shows the link Attachment link from our test site for Question 163.

A pop up box will ask, "Are you sure you want to create an attachment folder for question XXXX?" Answer OK or click on the Cancel button. The image below shows the pop up box for Question 163 in our test site.

From there, a pop up box will appear called "Attachment folder for question XXXX". From this window, you may browse your local drives for files, upload files and see what files are already associated with this specific question. The image below shows the Attachment folder upload pop up box for Question 163 in our test site.
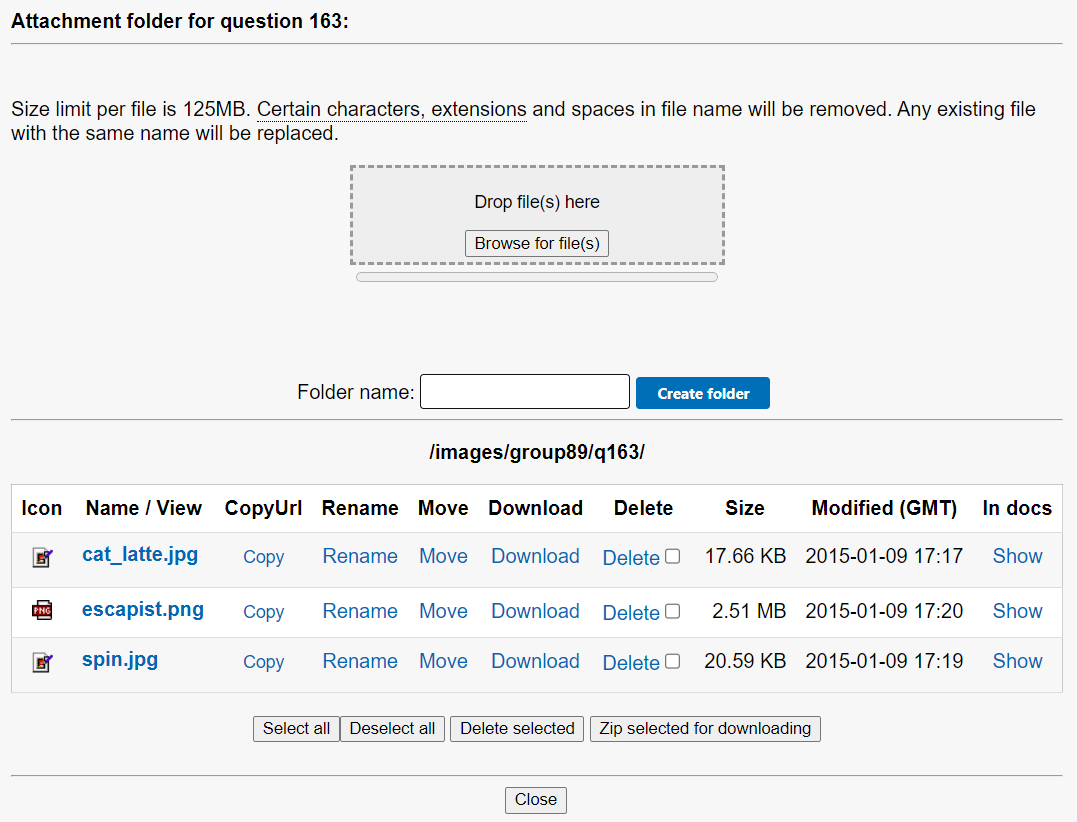
After selecting the appropriate files, click the Upload button and watch your image populate the table in that screen.
Click on the Close button to close this window.
Back in the Attachment section of the Question Editor screen you will see a table with the uploaded files. Select the appropriate placement for your file by clicking on one of the links; "Insert img in: Question ChoiceA ChoiceB ChoiceC ChoiceD ChoiceE Explanation" next to the files you wish to embed. The image below shows the attachments in Question 163 in our test site.

The file you wish to embed will appear in the field you have selected. You may modify that field after embedding the file. The image below shows a file embedded in the Explanation field of Question 163 in our test site.

Click Submit to save your changes.
Examples of Types of Questions you can Create
While all questions will ultimately be multiple choice, you can word your questions and answers to encompass a few different variations on this. For example:
-
All or none of the above: In addition to individual possible answers, include an option for "All of the above" and/or "None of the above" as possible choices. Similarly, write choices that include a unique combination of other choices, for example, one of your choices could say, "Both A and C".
-
True or False: Phrase your question as a statement, and enter "True" for Choice A and "False" for Choice B.
-
Fill-in-the-blank: Phrase your question as a statement with one or more blanks, then offer possible word(s) to complete the statement as your choices.