Zoom, How do I start or schedule a Zoom Meeting?
This article describes various ways to start a Zoom meeting
Note: there are two main types of meetings. Scheduling one for in the future or starting one live.
Zoom meetings can be started and scheduled using many different applications.
Web Portal:illinois.zoom.us
- Navigate to illinois.zoom.us and sign in following the instructions here: Zoom, Logging in
- Click the Meetings tab in the upper left corner

- Click the Schedule a meeting button

- Configure your meeting settings. Some settings you may want to consider:
- Use a clear and concise Topic and Description so your participants can easily confirm they are in the right place. Be aware that your meeting Topic will automatically be applied to the waiting room pop up when a participant joins a meeting.
- Passwords are required by default and cannot, for any reason, be disabled or removed from a meeting or webinar created in the UIUC Zoom account. Recurring meetings will have the same password for the entire series by default.
- Use a recurring meeting if you need multiple meeting instances with the same join link (meeting ID) and password by default. Recurring meeting ID's will continue to work for up to 365 days after the first meeting occurrences is started. For single meetings, the meeting ID (link) will expire 30 days after the meeting has begun. Be aware that if you schedule a single meeting and start it even momentarily, more than 30 days before the scheduled meeting time, the meeting ID will have expired when you attempt to meet on the scheduled date.
- It is strongly recommended to generate a meeting ID automatically instead of using your personal meeting ID. Your personal meeting id should be reserved for meetings with regular, known participants, such as small department or research meetings with colleagues.
- Use the waiting room for increased security or if you would like to have more control over participant entrance. By default the waiting room is set to force all guests entering your meeting to stop in the waiting room. You can set it to allow participants to bypass the waiting room if they are in the UIUC account, or within the UIUC Zoom account and domains you have safelisted on your settings page at illinois.zoom.us/profile/setting. More information about using the waiting room can be found at: Zoom Support, Waiting Room.
- By default UIUC Zoom meetings will be set to force guests to sign into any Zoom account. This is controlled by the meeting setting called Require authentication to join. If you have a meeting of only U of I System guests, please consider clicking the drop down and selecting Sign in with Illinois NetID and password. Sign in with Illinois NetID and password will restrict your meetings to only Zoom accounts with and email address ending in one of the main U of I system domains and subdomains (illinois.edu, uillinois.edu, uic.edu, uis.edu and subdomains such as chem.illinois.edu, vetmed.illinois.edu, etc). More information about meeting authentication can be found at: Zoom, using authentication options to limit access to your event.
- Select, mute participants upon entry. This default setting ensure that guests who join late will not inadvertently disrupt your meeting with an unmuted microphone.
- Pre-assign breakout rooms if you need them. Note that you must ensure your guests join using the Zoom account associated with the email address you add to the breakout room pre-assignment. If the meeting host wants to delegate breakout room controls to co-hosts in their Zoom meeting, both hosts and co-hosts must be updated to Zoom desktop version 5.4.6. More information about breakout rooms can be found at: Zoom, configuring breakout rooms
- Add alternative hosts to your meeting if you want to allow others to have the ability to start the meeting and assume the host role on your behalf. The first scheduling host or alternative host to join the meeting will be made host by default. Any alternative host that joins after the host role has been taken, will be made a co-host by default. If the scheduling host joins the meeting after the host role has already been delegated to an alternative host, they will automatically reclaim the host role from the alternative host. Alternative hosts must have a licensed Zoom account in the same Zoom tenant to be added to your meeting.
- Click save at the bottom of the window when finished.
- Download the calendar file if you need to add it to your calendar, or share it with guests via email.
NOTE: This method will allow you to start an impromptu meeting. Choose another method below if you would like to schedule a meeting for a later date/time.
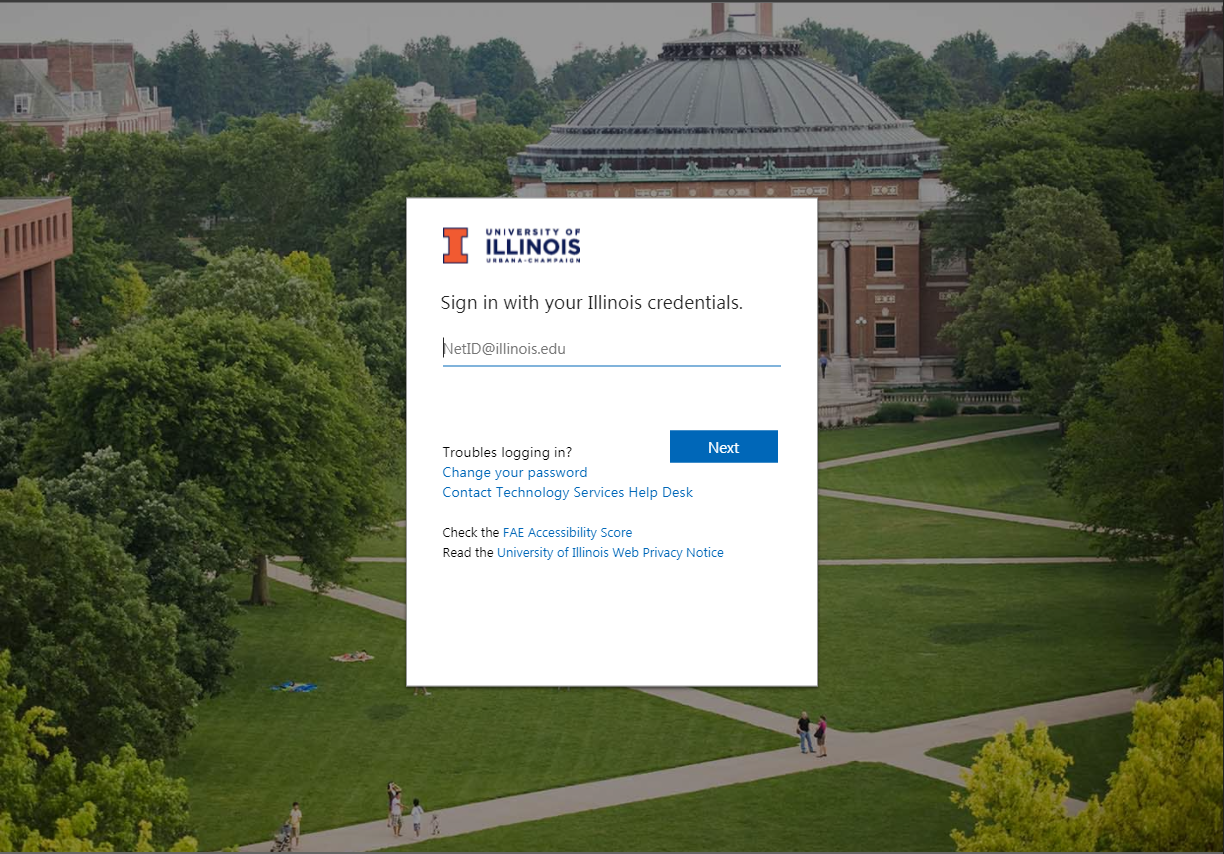
- Navigate to illinois.zoom.us
- Select Host

- Login with your Illinois NetID credentials
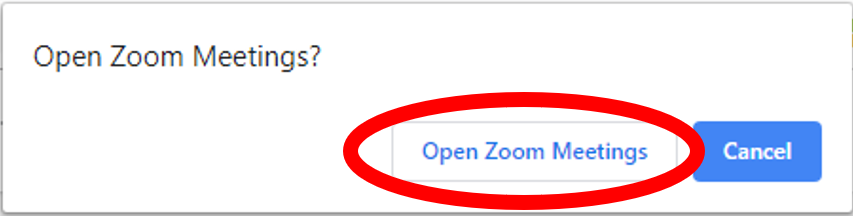
- Select "Open in Zoom Meetings"
- The Zoom Desktop Application should open. Click Join with Computer Audio:
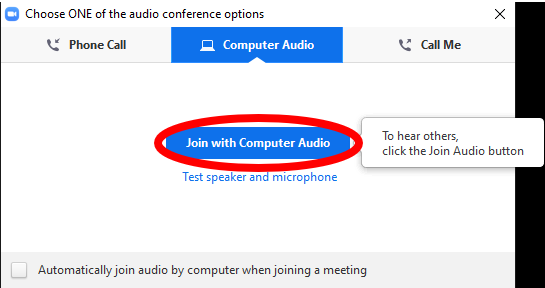
- At this point you will be able to invite more attendees/meeting participants using either their email or by giving them the meeting ID which is needed if the participant is calling in.

Zoom Desktop Client
- Open Zoom Desktop Application

- Log in (if necessary)
- Detailed Login Instructions can be found Zoom, Logging in
- You will then have two options:
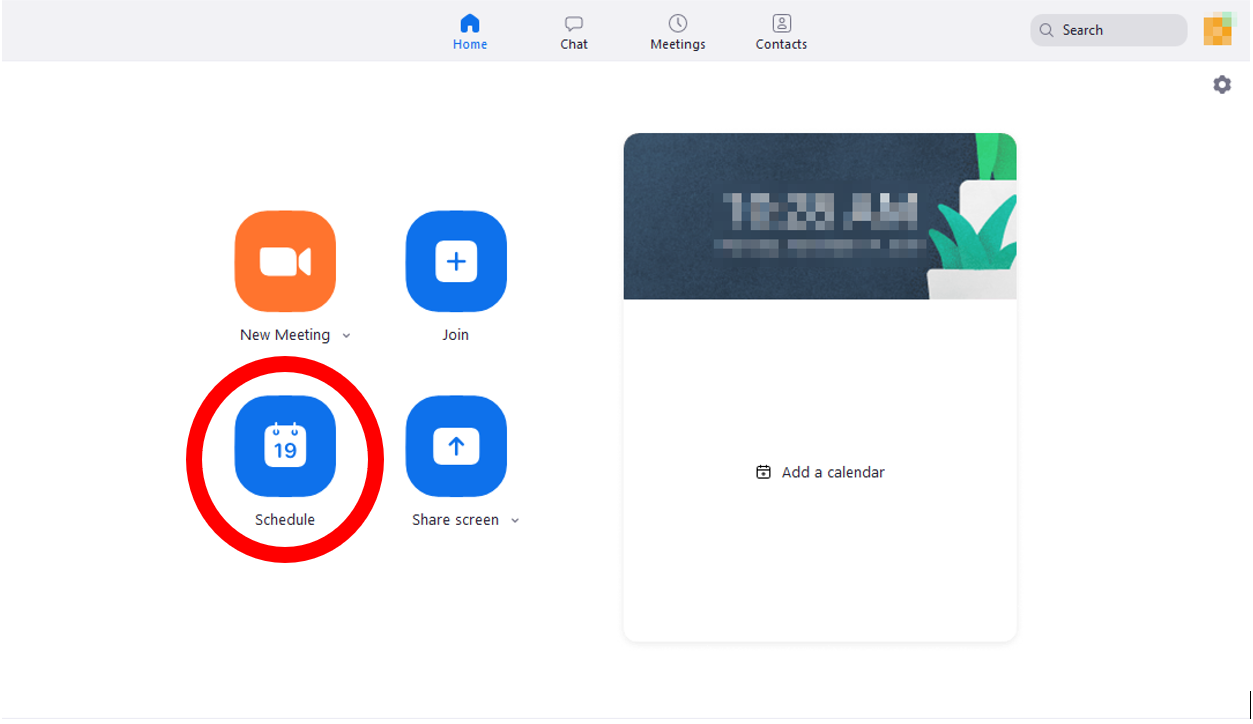
- If you would like to start an instant meeting, select the orange “New Meeting” button.
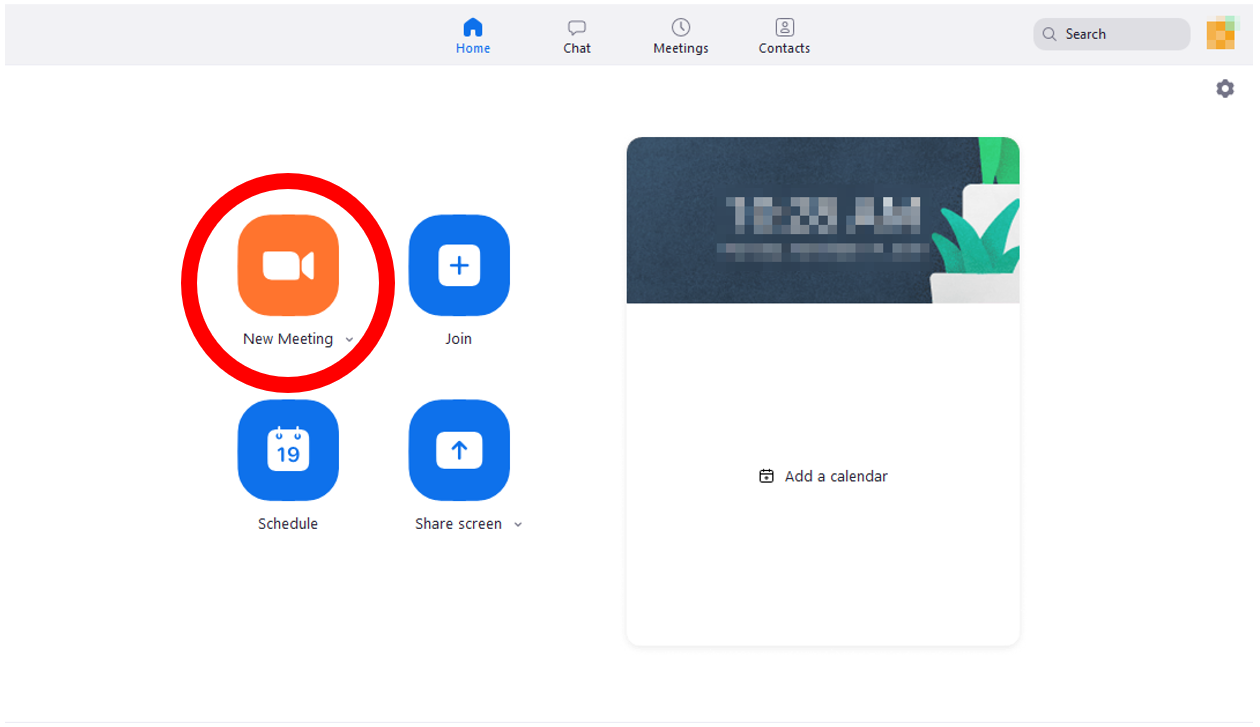
- NOTE: The drop down below the “New Meeting” button allow the user to either start the meeting with video or Use their personal meeting ID if meetings are recurring.
A new window will generate and you should then be in a new Zoom meeting. At this point, you will be able to invite more attendees either by sending a meeting invitation to their email or by giving them the meeting ID. The meeting ID is necessary for meeting participants who are calling in by telephone.
- If you would like to Schedule a meeting for in the future, select the Schedule button.
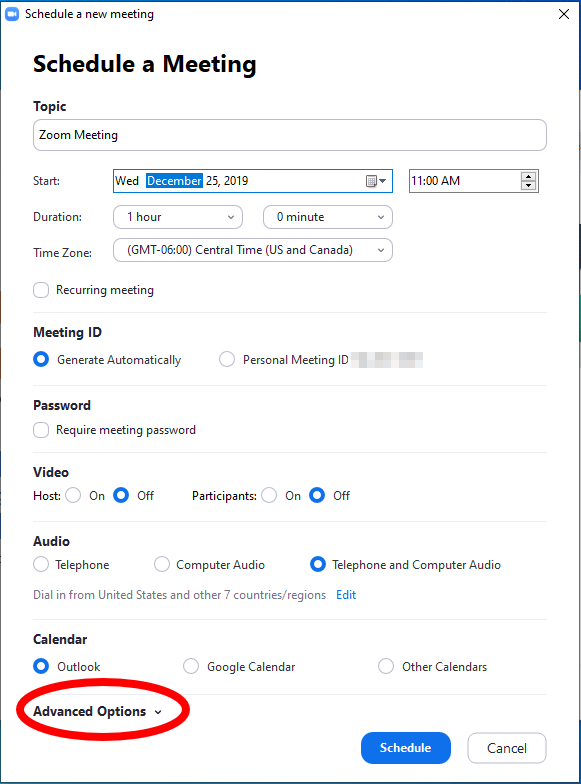
- A new menu should appear that will allow you to set the meeting Start, Duration (Note: the duration of the meeting doesn't actually limit the meeting time and it is for scheduling purposes only). Click the "Advanced Options" button (highlighted below) to display more options:
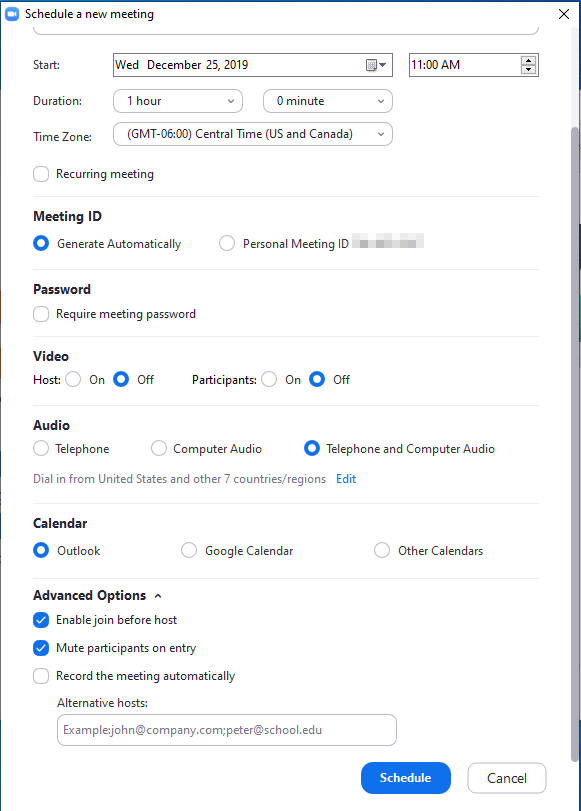
- This will allow you to set more options for you meeting:
- Configure your meeting settings. Some settings you may want to consider:
- Use a clear and concise Topic and Description so your participants can easily confirm they are in the right place. Be aware that your meeting Topic will automatically be applied to the waiting room pop up when a participant joins a meeting.
- Passwords are required by default and cannot, for any reason, be disabled or removed from a meeting or webinar created in the UIUC Zoom account. Recurring meetings will have the same password for the entire series by default.
- Use a recurring meeting if you need multiple meeting instances with the same join link (meeting ID) and password by default. Recurring meeting ID's will continue to work for up to 365 days after the first meeting occurrences is started. For single meetings, the meeting ID (link) will expire 30 days after the meeting has begun. Be aware that if you schedule a single meeting and start it even momentarily, more than 30 days before the scheduled meeting time, the meeting ID will have expired when you attempt to meet on the scheduled date.
- It is strongly recommended to generate a meeting ID automatically instead of using your personal meeting ID. Your personal meeting id should be reserved for meetings with regular, known participants, such as small department or research meetings with colleagues.
- Use the waiting room for increased security or if you would like to have more control over participant entrance. By default the waiting room is set to force all guests entering your meeting to stop in the waiting room. You can set it to allow participants to bypass the waiting room if they are in the UIUC account, or within the UIUC Zoom account and domains you have safelisted on your settings page at illinois.zoom.us/profile/setting. More information about using the waiting room can be found at: Zoom Support, Waiting Room.
- By default UIUC Zoom meetings will be set to force guests to sign into any Zoom account. This is controlled by the meeting setting called Require authentication to join. If you have a meeting of only U of I System guests, please consider clicking the drop down and selecting Sign in with Illinois NetID and password. Sign in with Illinois NetID and password will restrict your meetings to only Zoom accounts with and email address ending in one of the main U of I system domains and subdomains (illinois.edu, uillinois.edu, uic.edu, uis.edu and subdomains such as chem.illinois.edu, vetmed.illinois.edu, etc). More information about meeting authentication can be found at: Zoom, using authentication options to limit access to your event.
- Select, mute participants upon entry. This default setting ensure that guests who join late will not inadvertently disrupt your meeting with an unmuted microphone.
- Pre-assign breakout rooms if you need them. Note that you must ensure your guests join using the Zoom account associated with the email address you add to the breakout room pre-assignment. If the meeting host wants to delegate breakout room controls to co-hosts in their Zoom meeting, both hosts and co-hosts must be updated to Zoom desktop version 5.4.6. More information about breakout rooms can be found at: Zoom, configuring breakout rooms
- Add alternative hosts to your meeting if you want to allow others to have the ability to start the meeting and assume the host role on your behalf. The first scheduling host or alternative host to join the meeting will be made host by default. Any alternative host that joins after the host role has been taken, will be made a co-host by default. If the scheduling host joins the meeting after the host role has already been delegated to an alternative host, they will automatically reclaim the host role from the alternative host. Alternative hosts must have a licensed Zoom account in the same Zoom tenant to be added to your meeting.
- Click schedule at the bottom of the window when finished.
Outlook Desktop Application:
- Open the Calendar within the Outlook Desktop App.
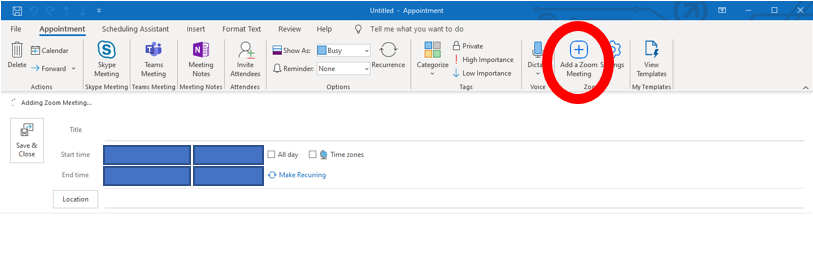
- Select "New Appointment"

- Click "Add a Zoom Meeting". This is found in the settings bar of the New Appointment window:

- Configure Meeting settings:
- Start and End Time
- Make Recurring if you require more than one instance on your Outlook calendar
- Review the Reminder Time and adjust if needed
- Click the settings gear (shown below) to confirm you Zoom meeting settings.

- Some settings you may want to consider:
- Use a clear and concise Topic and Description so your participants can easily confirm they are in the right place. Be aware that your meeting Topic will automatically be applied to the waiting room pop up when a participant joins a meeting.
- Passwords are required by default and cannot, for any reason, be disabled or removed from a meeting or webinar created in the UIUC Zoom account. Recurring meetings will have the same password for the entire series by default.
- Use a recurring meeting if you need multiple meeting instances with the same join link (meeting ID) and password by default. Recurring meeting ID's will continue to work for up to 365 days after the first meeting occurrences is started. For single meetings, the meeting ID (link) will expire 30 days after the meeting has begun. Be aware that if you schedule a single meeting and start it even momentarily, more than 30 days before the scheduled meeting time, the meeting ID will have expired when you attempt to meet on the scheduled date.
- It is strongly recommended to generate a meeting ID automatically instead of using your personal meeting ID. Your personal meeting id should be reserved for meetings with regular, known participants, such as small department or research meetings with colleagues.
- Use the waiting room for increased security or if you would like to have more control over participant entrance. By default the waiting room is set to force all guests entering your meeting to stop in the waiting room. You can set it to allow participants to bypass the waiting room if they are in the UIUC account, or within the UIUC Zoom account and domains you have safelisted on your settings page at illinois.zoom.us/profile/setting. More information about using the waiting room can be found at: Zoom Support, Waiting Room.
- By default UIUC Zoom meetings will be set to force guests to sign into any Zoom account. This is controlled by the meeting setting called Require authentication to join. If you have a meeting of only U of I System guests, please consider clicking the drop down and selecting Sign in with Illinois NetID and password. Sign in with Illinois NetID and password will restrict your meetings to only Zoom accounts with and email address ending in one of the main U of I system domains and subdomains (illinois.edu, uillinois.edu, uic.edu, uis.edu and subdomains such as chem.illinois.edu, vetmed.illinois.edu, etc). More information about meeting authentication can be found at: Zoom, using authentication options to limit access to your event.
- Select, mute participants upon entry. This default setting ensure that guests who join late will not inadvertently disrupt your meeting with an unmuted microphone.
- Pre-assign breakout rooms if you need them. Note that you must ensure your guests join using the Zoom account associated with the email address you add to the breakout room pre-assignment. If the meeting host wants to delegate breakout room controls to co-hosts in their Zoom meeting, both hosts and co-hosts must be updated to Zoom desktop version 5.4.6. More information about breakout rooms can be found at: Zoom, configuring breakout rooms
- Add alternative hosts to your meeting if you want to allow others to have the ability to start the meeting and assume the host role on your behalf. The first scheduling host or alternative host to join the meeting will be made host by default. Any alternative host that joins after the host role has been taken, will be made a co-host by default. If the scheduling host joins the meeting after the host role has already been delegated to an alternative host, they will automatically reclaim the host role from the alternative host. Alternative hosts must have a licensed Zoom account in the same Zoom tenant to be added to your meeting.
- Invite Attendees
- Click Send
Outlook Web Application (OWA/Webmail)
- Follow the steps above to add the plugin to the Outlook Web Application and Login
- Navigate to your Calendar within the Outlook Web Application
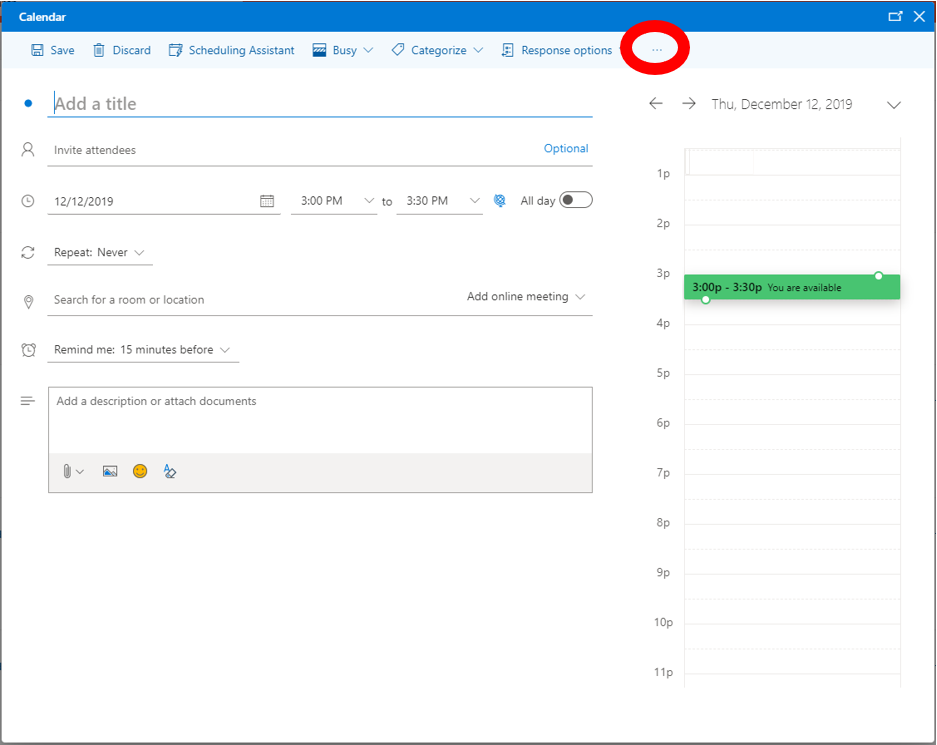
- Click the "New Event" button

- Find the Ellipsis in the upper right section of the new event pop out window
- Hover over "Zoom"
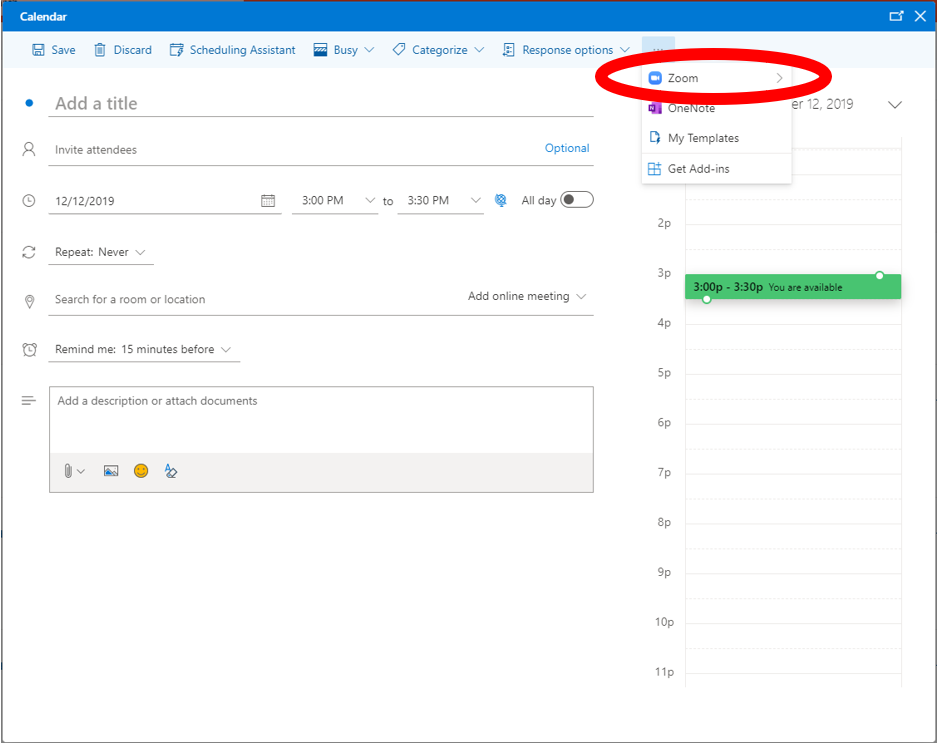
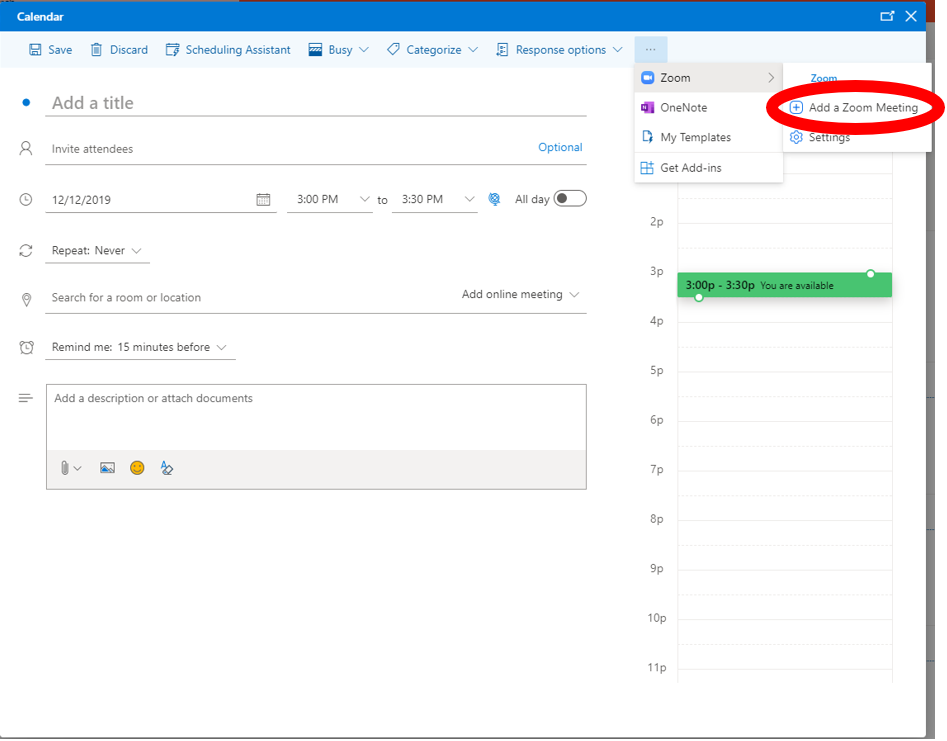
- click "Add a Zoom Meeting"
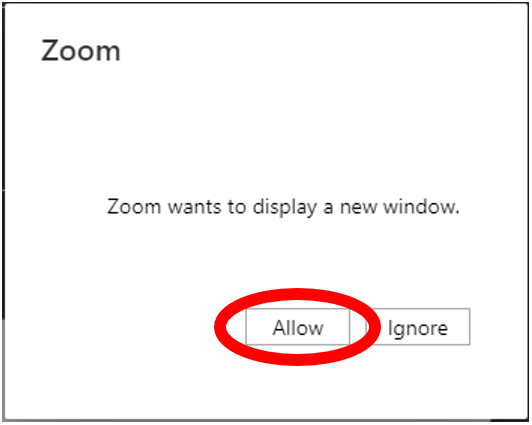
- Note: if this is the first time you have logged into Zoom, through OWA, please click "Allow" when prompted to allow Zoom to open a new window
- Click "SSO"
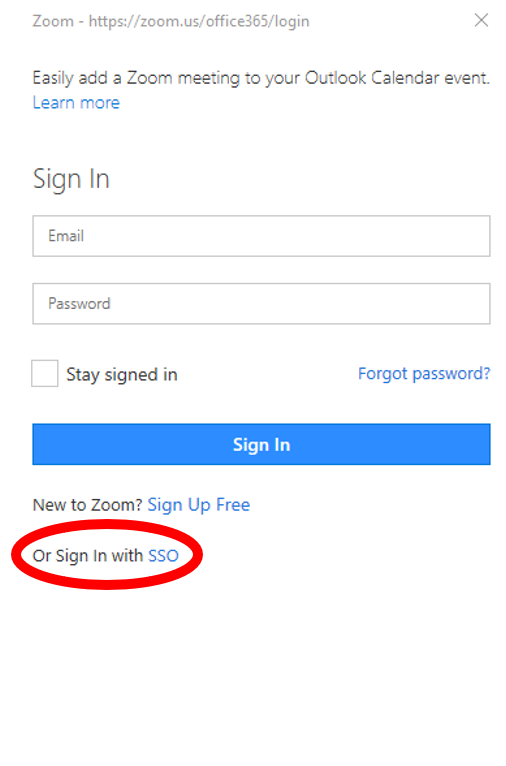
- Enter "illinois" as your domain: "illinois.zoom.us"
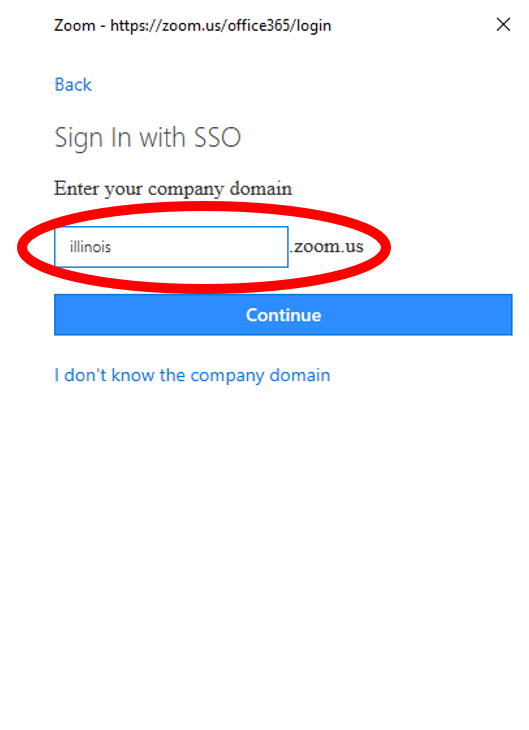
- Login with your netid and password (if necessary). Users who have their credentials saved will bypass this screen:
- Invite Attendees
- Configure your meeting settings
- Click "Save"
Gmail/Google Calendar
- Navigate to: calendar.google.com
- Select "Create" in the upper lefthand corner:
- Select more options in the pop out window
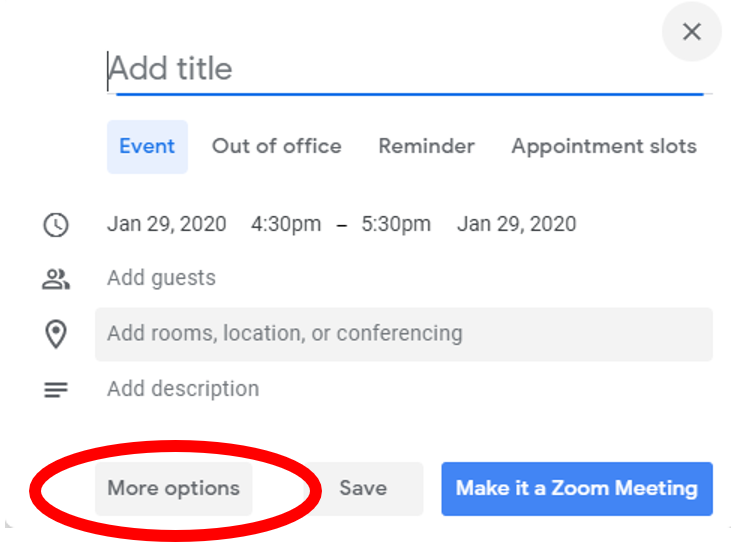
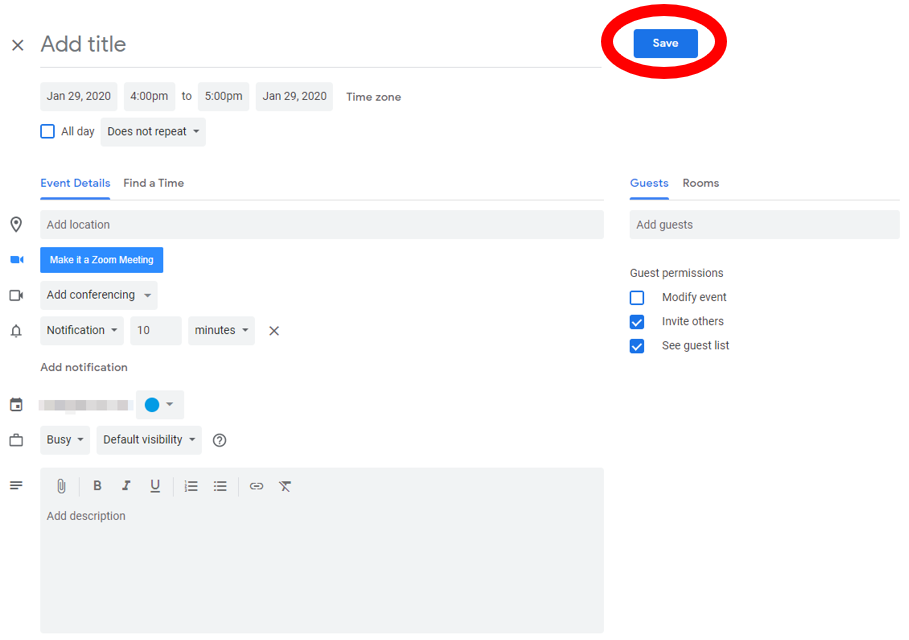
- In the pop out window enter the meeting information/description, start and end times and invite your meeting attendees.
- Click "Make it a Zoom Meeting"
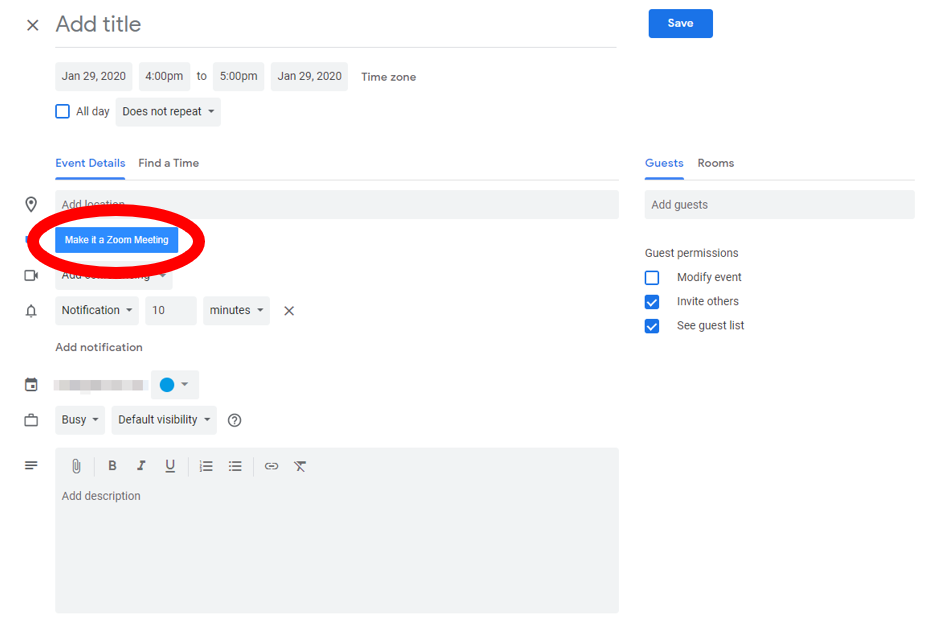
- Click "Save"
Other Integrations
- At this time, we are logging integrations users are interested in. If you would like an integration that is not already available please email consult@illinois.edu or request it via the Zoom Marketplace. The Zoom Team will record these requests and track popular requested integrations. If and when these integrations are implemented the Zoom Team will notify those who were recorded as interested.