HOWTO: Remove / Disable MDM (Mobile Device Management) policies
Microsoft's Mobile Device Management policies are setup on all machines (campus-owned as well as personally-owned) by default when Office is installed. While these policies are generally reasonable for University-owned computers, they may not be desired on personally-owned computers.
The first time you start an Office application, you're likely to get a prompt to log in. Once logged in, a screen will appear asking you if you want to "Stay signed in to all your apps" (see below).
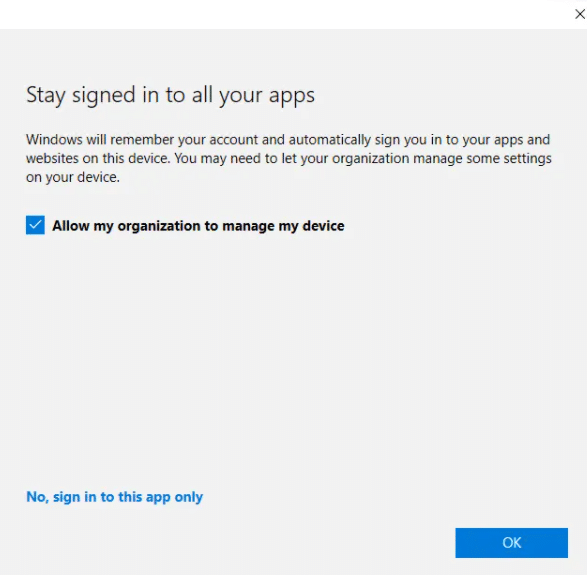
For University-owned machines, leaving the Allow my organization to manage my device option is fine. This enables tools to help Tech Services and/or the police to find stolen devices, and if necessary, force a remote wipe of the device.
For personally-owned devices, we recommend selecting the No, sign into this app only option. Just know that you'll need to repeat this for every Office application.
If you've already enabled MDM on your device and want to disable it:
- Click Start, then search for "Edit Group Policy" or "Local Group Policy Editor"
- Navigate to: Computer configuration > Administrative Templates > Windows Components > MDM > Disable MDM Enrollment
- NOTE: This doesn't remove existing MDM policies, just prevents new ones from being applied
- Remove the "Work or School" Microsoft account (see https://www.onmsft.com/how-to/how-to-manage-personal-work-and-school-accounts-in-windows-10)
The next time you start an Office application, you're likely to get a prompt to log in. Select the "No, sign into this app only" or "allow my organization to manage my device" - either way, the MDM policies should not be re-applied.