iSchool Classroom, LIS 242
Control Panel
Rooms 12A, 46, 131 and 242
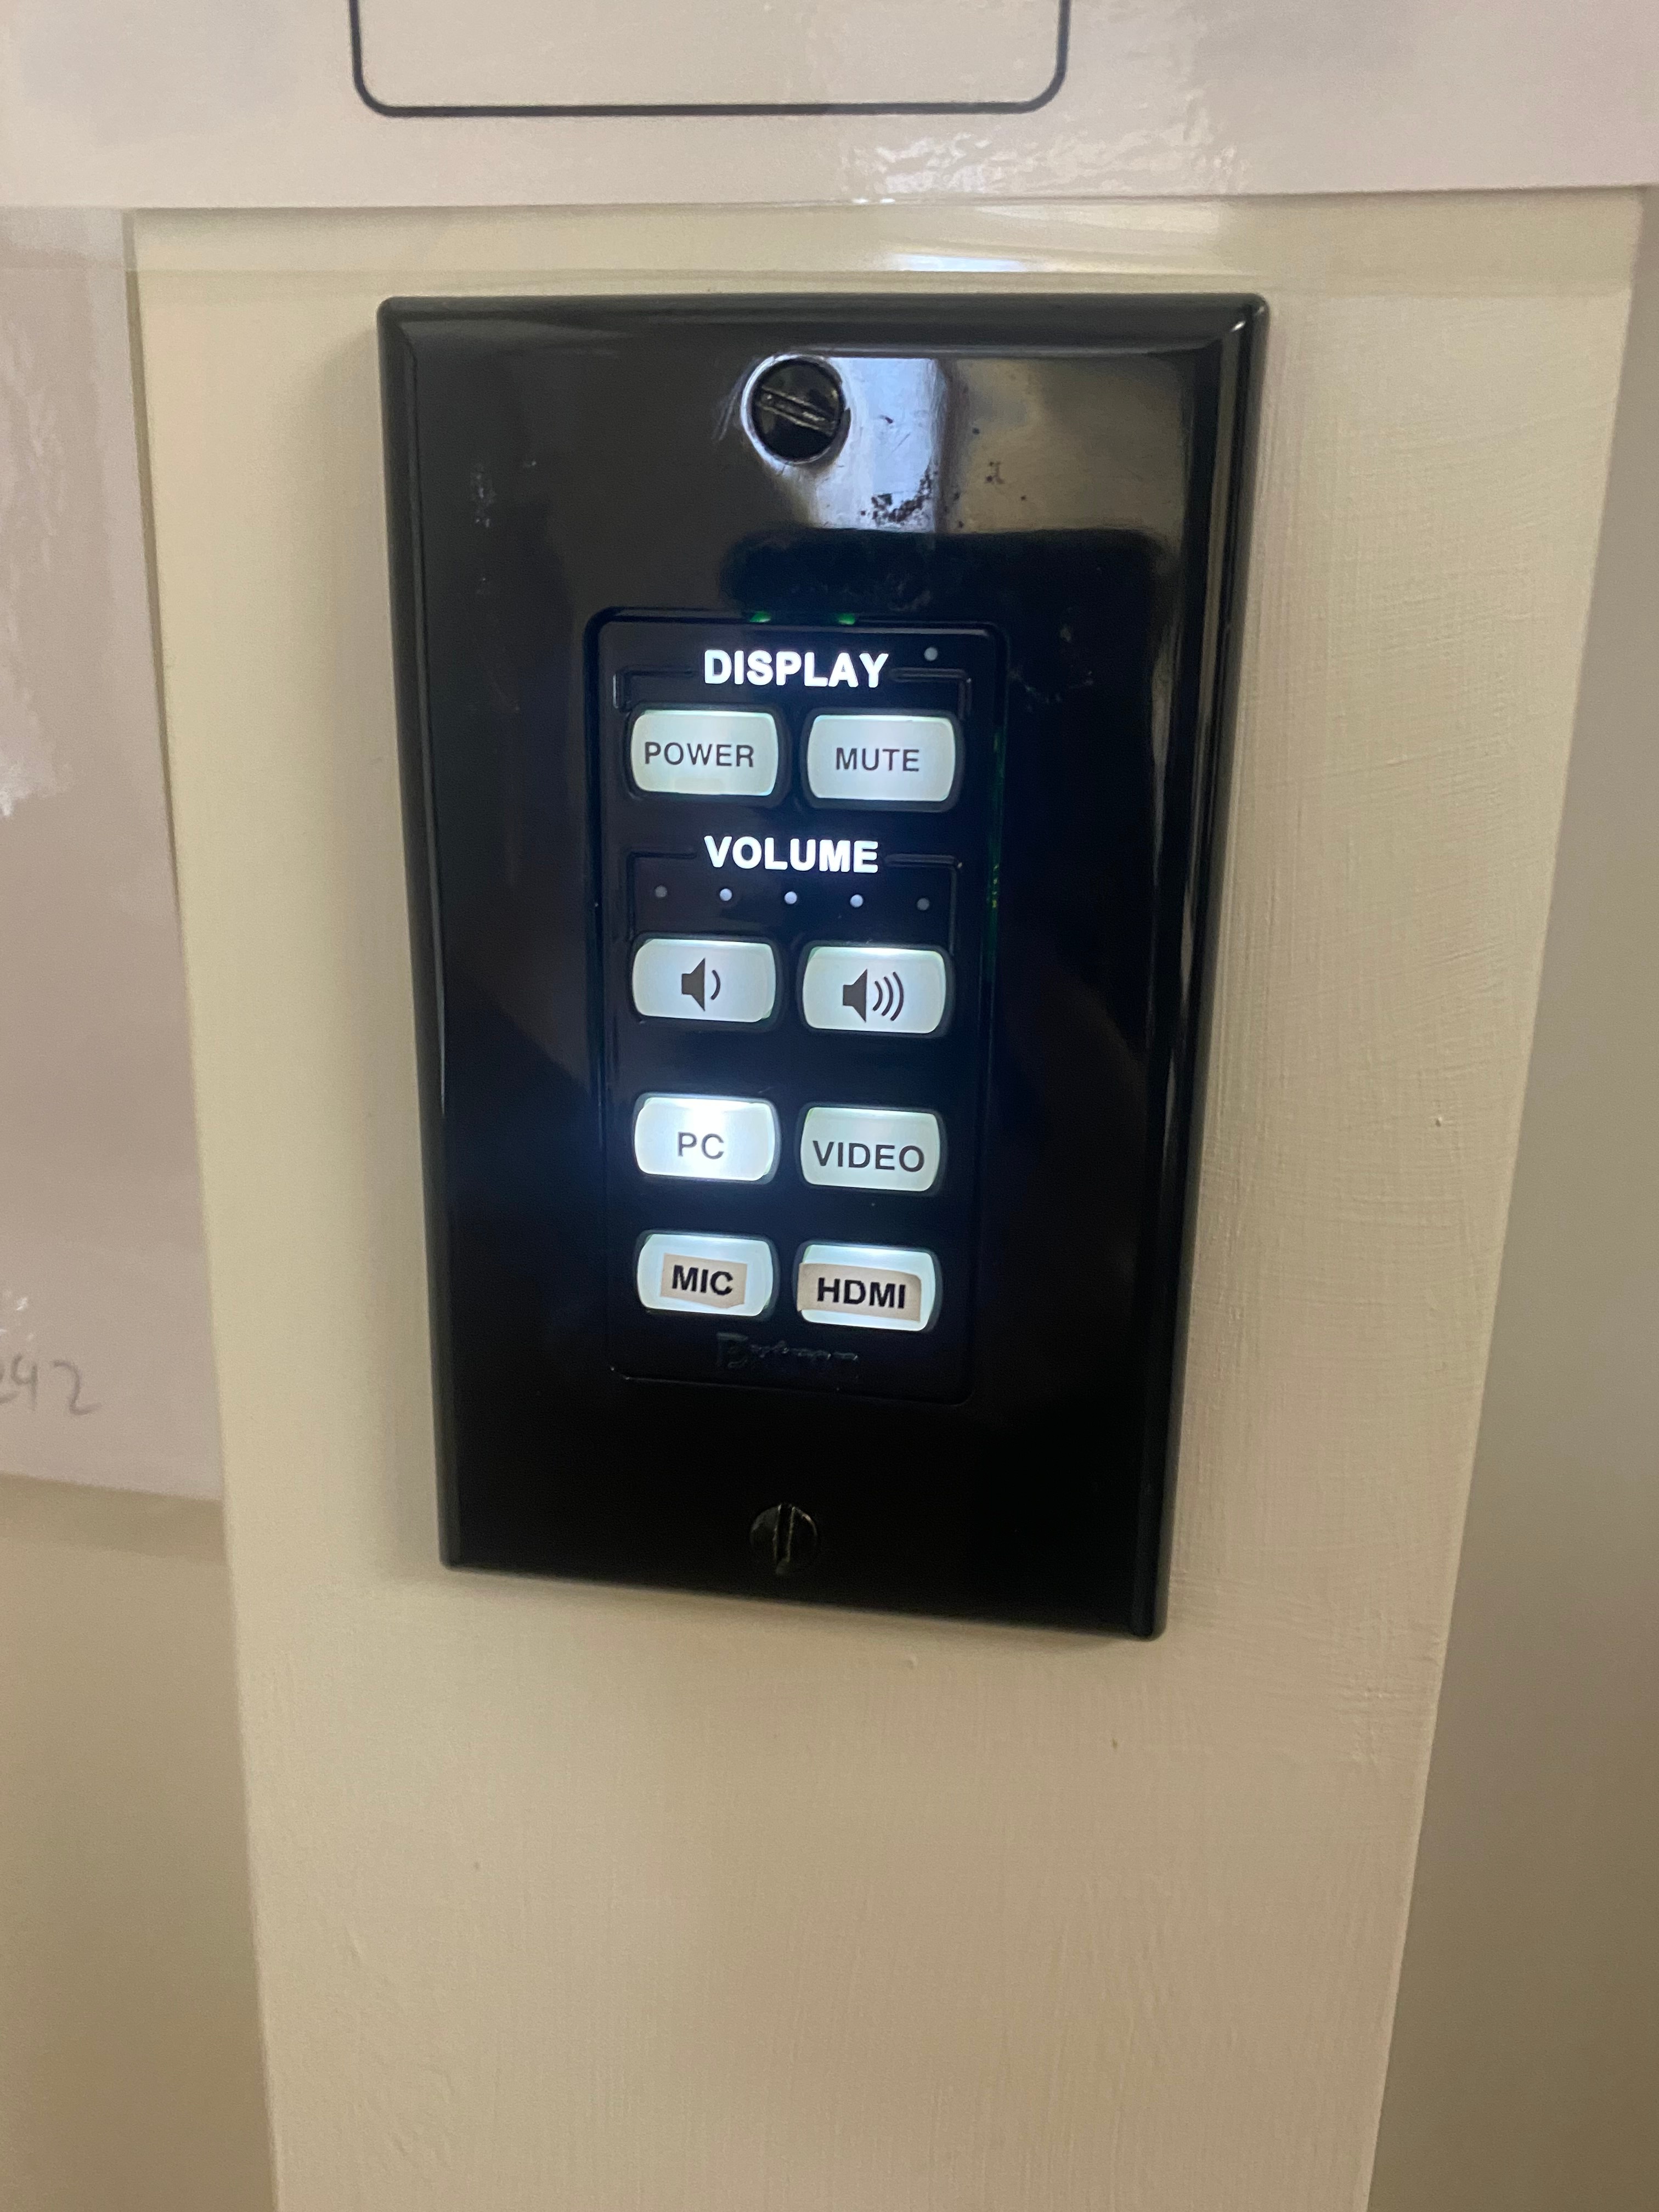
These rooms have standard control panels with six command buttons.
- Power: Turns on and off the systems for the projector.
-
Mute: Pauses the projection.
-
Volume: Controls the volume of the room speakers. (Please adjust the volume on built-in computer or laptop first.)
-
PC: This enables you to project the built-in computer to the television screens. This is the optimal way to use these rooms. If you have a guest joining online, please use this setting. You can also join the same meeting on your laptop (muting your laptop's speakers and mic) for ease and comfort, but be sure the built-in computer is handling sound.
-
HDMI 2: This enables you to project a laptop screen via an HDMI cable.
- VIDEO: This will give you the same options as PC (in rooms with Solstice capabilities this will be the setting you will need to use).
-
VGA: This will give you the same options as PC.

Rooms 53 and 126
These are irregular control panels.
Room 53
The control panel in this room can be found within the black cage on top of the desk in the South-West corner. The cage is not locked, but you may need to turn the buttons to select Built-in, HDMI, or Solstice.

Room 126
The control panel in this room is touch screen. It is located beneath the computer, built in the desk. The touch screen will take a moment or two for it to register your touch; so the key is to give it a few seconds if it doesn't automatically respond.
Tip: every time the system is powered on, the button Room Mic Mute, will be orange, indicating that it is muted. Just pressing the orange button will un-mute it and turn the button blue.

Here is the main screen. To turn on the projector, press the System off button in the upper left side. This should turn on the projector from the far end of the entrance and screens. Please do not manually pull down the projector screens. If you want dual screen projection, then you need to back to the Home screen on the control panel and press on the "Dual Projection".
Using the Built-in Computer
Using the built-in computer is the normally optimal way to use our conference rooms, especially for Zoom calls as only the built-in computer connects to the built-microphone and cameras. However, rooms 126 and 43 are both outfitted to avoid this issue. Many people prefer to use their own laptops to navigate, so it'll be good practice to recommend them these rooms when we can.
- Follow the instructions on How to use the control panel (Room 4035, 4165, 5116), How to use the control panel (Multi-Purpose Room), or How to use the control panel (Room 12A, 46, 53, 126 and 131).
- Use the keyboard and mouse located on top of the cabinet or on the conference room table to control the built-in computer.
- These may be turned off. You can turn them back on using the power switches.
- These do have a range, so if they work close to the receiver but not elsewhere in the room, you might be out of range.
- If you cannot locate these items or suspect the batteries are low, check with the Help Desk.
- Log in using your NetID and password. Guests will not be able to log into these computers.
Using Your Laptop (Meeting Owl)
Get the room ready by turning on the display and selecting HDMI from the control console on the wall.

Take the USB-C cable connected to the Owl and plug it into your PC.

Take the HDMI cable connected to the conference table and connect it to your PC.


If you are hosting a meeting, bring it up and check your video and audio setting to confirm they are set correctly.
-
- If you are using the Owl for camera, mic, and speakers please make sure your configuration matches the image below:


-
- If you are using the Owl for camera and mic, but would prefer to use the built-in ceiling speakers, change the speaker to PT-RZ570 (HD Audio Driver for Display Audio) and keep the microphone the same.
Clicker
Note: Our laser pointers can also be used as clickers to navigate slideshow presentations.
Clicker Instructions
- Remove the USB device from the clicker–it should be located on the back of the clicker near the top.

- Insert the USB device into the computer you would like to present from.

- Navigate to the slideshow you would like to present and open it (you can also press the yellow F5/Esc button on the clicker to start the presentation).

- Use the arrow keys on the clicker to navigate the slideshow.
Troubleshooting
If a clicker is not working, check that:
- The USB connector is plugged into the computer using the clicker.
- The clicker is turned on.
- The batteries are not dead. (Try out the laser pointer function on the clicker to confirm.)
- The slideshow is active window on the computer using the clicker. If a person is presenting in PowerPoint, then switches to another window, the clicker will not advance the slides until they make the slideshow the active window by clicking inside PowerPoint. This is a particularly common issue for hybrid presentations, when a presenter may be switching between PowerPoint and Zoom.
Solstice Wireless Content Sharing
Connecting to Solstice on a Windows device
If you want to connect wirelessly to a Windows laptop, you will need to download and install the Solstice application on your device. If you are borrowing a laptop from the Help Desk, this should already be installed. (For Mac users: you can follow these same steps, but you also have the option to use AirPlay, which does not require a separate download and installation.)
- Check that you are connected to the IllinoisNet wireless network.
- Specific instructions by room:
- Room 126:
- Select Use a Laptop > Solstice from the Control Panel (refer to "Using the Control Panel" if you are unsure how to perform this step).
- On your laptop, follow the instruction displayed on the built-in's monitor and / or the projector screen by opening your browser and navigating to the URL displayed. If you need to download the Solstice application, there will be a link to do so. If you already have it installed, there is a link below that will open "room 126" in Solstice. Regardless of whether you have the application installed, if this is your first time using this room, you will need to click this link to bring up "room 126" within the application. *
- Rooms 46 & 53
- Select the "Video" button on the wall panel
- On your laptop, follow the instructions on the projector screen by opening your browser and navigating to the URL displayed. If you need to download the Solstice application, there will be a link to do so. If you already have it installed, there is a link below that will open "room XX" in Solstice. Regardless of whether you have the application installed, if this is your first time using this room, you will need to click this link to bring up "room XX" within the application. *
- Room 126:
- After you have installed Solstice and clicked the “Already have the app?” link, you will be given a 4-digit code on the built-in's monitor and / or the projector screen to input into the Solstice application on your laptop. Afterwards, click Connect.
- From there, you will be connected to the room and can choose to share your desktop, an application window, or a media file.
* After going through these steps once, you can just open the Solstice application after Step 2 and select the room from the recent list.
Connecting to Solstice on a Mac device using AirPlay
- Check that you are connected to the IllinoisNet wireless network.
- On the laptop, go to System Preferences > Displays and select the proper room from the available displays in the Add Display drop-down.
- You will be prompted to enter the AirPlay password.
- There should be a 4-digit code displayed on the screen.
- Enter this as the password. This password changes regularly so you do not need to save or remember it.
- From there, you will be connected to the room and can choose to share your desktop, an application window, or a media file.
Equipment
| Room 242 is equipped with the following: | Room 242 is NOT equipped with: |
|---|---|
|
|
Room 242 Layout
The layout of Room 242 with legend is shown below.

Additional Images
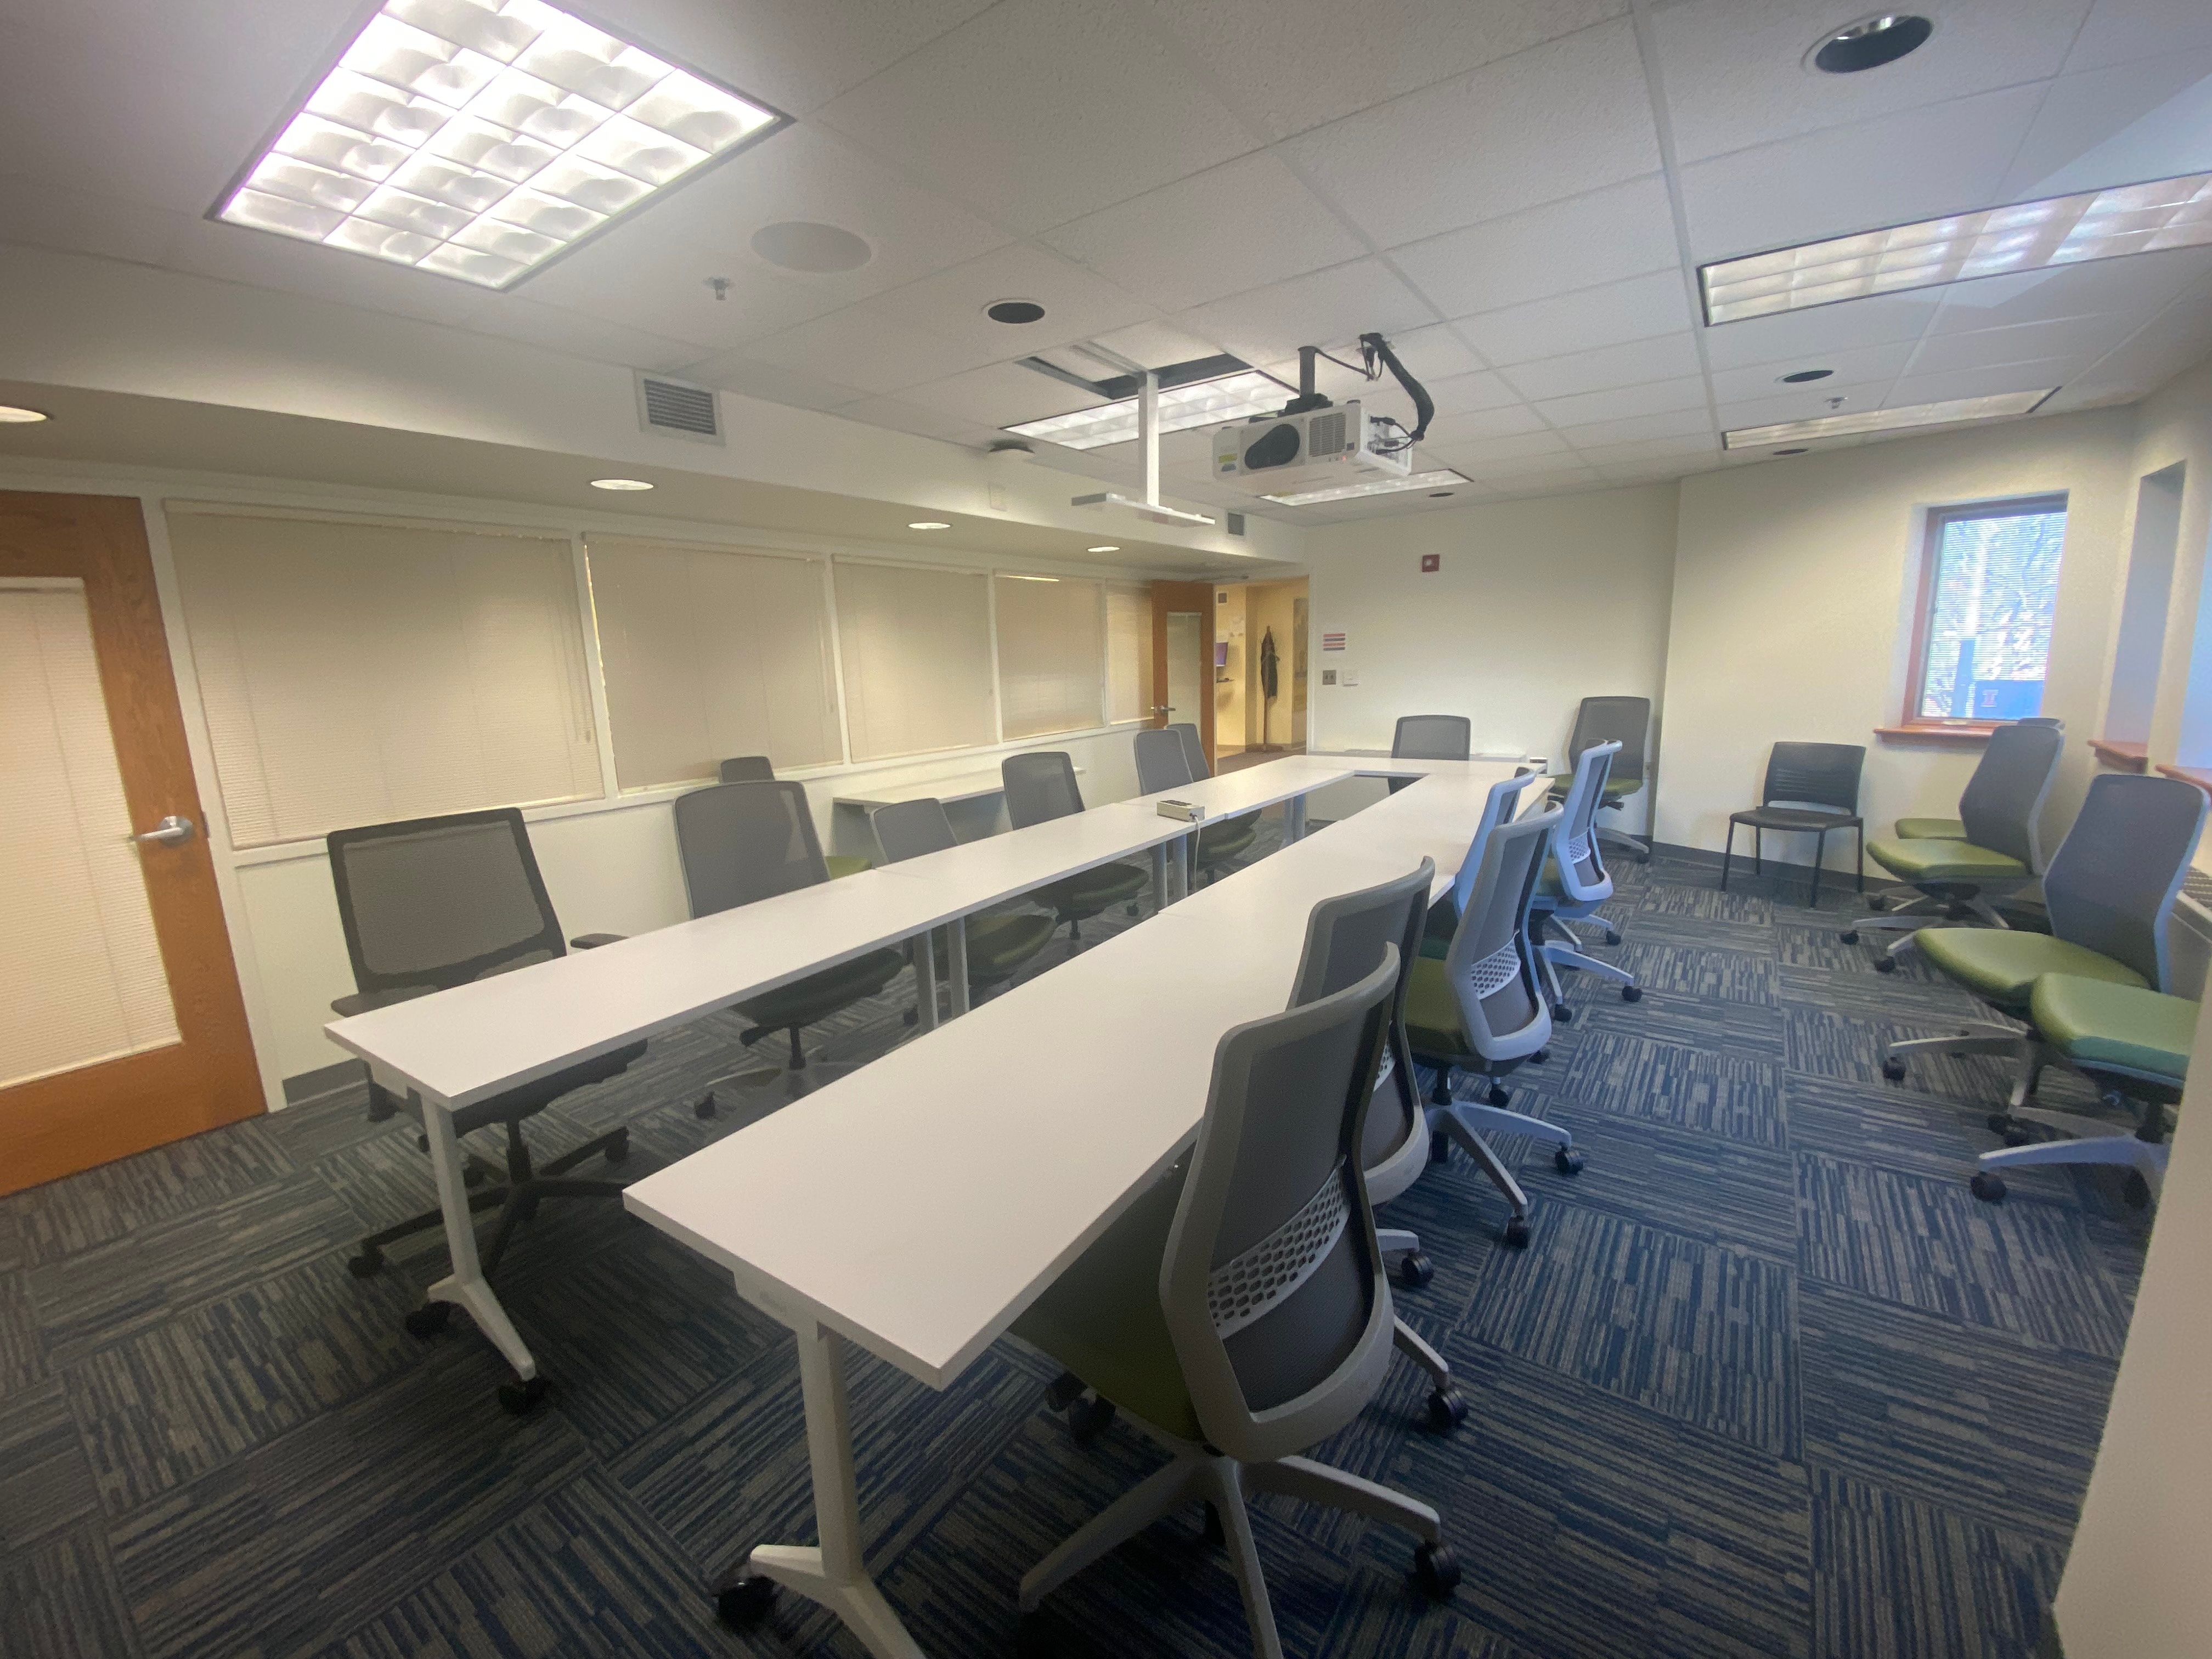
1. View from the front of the room
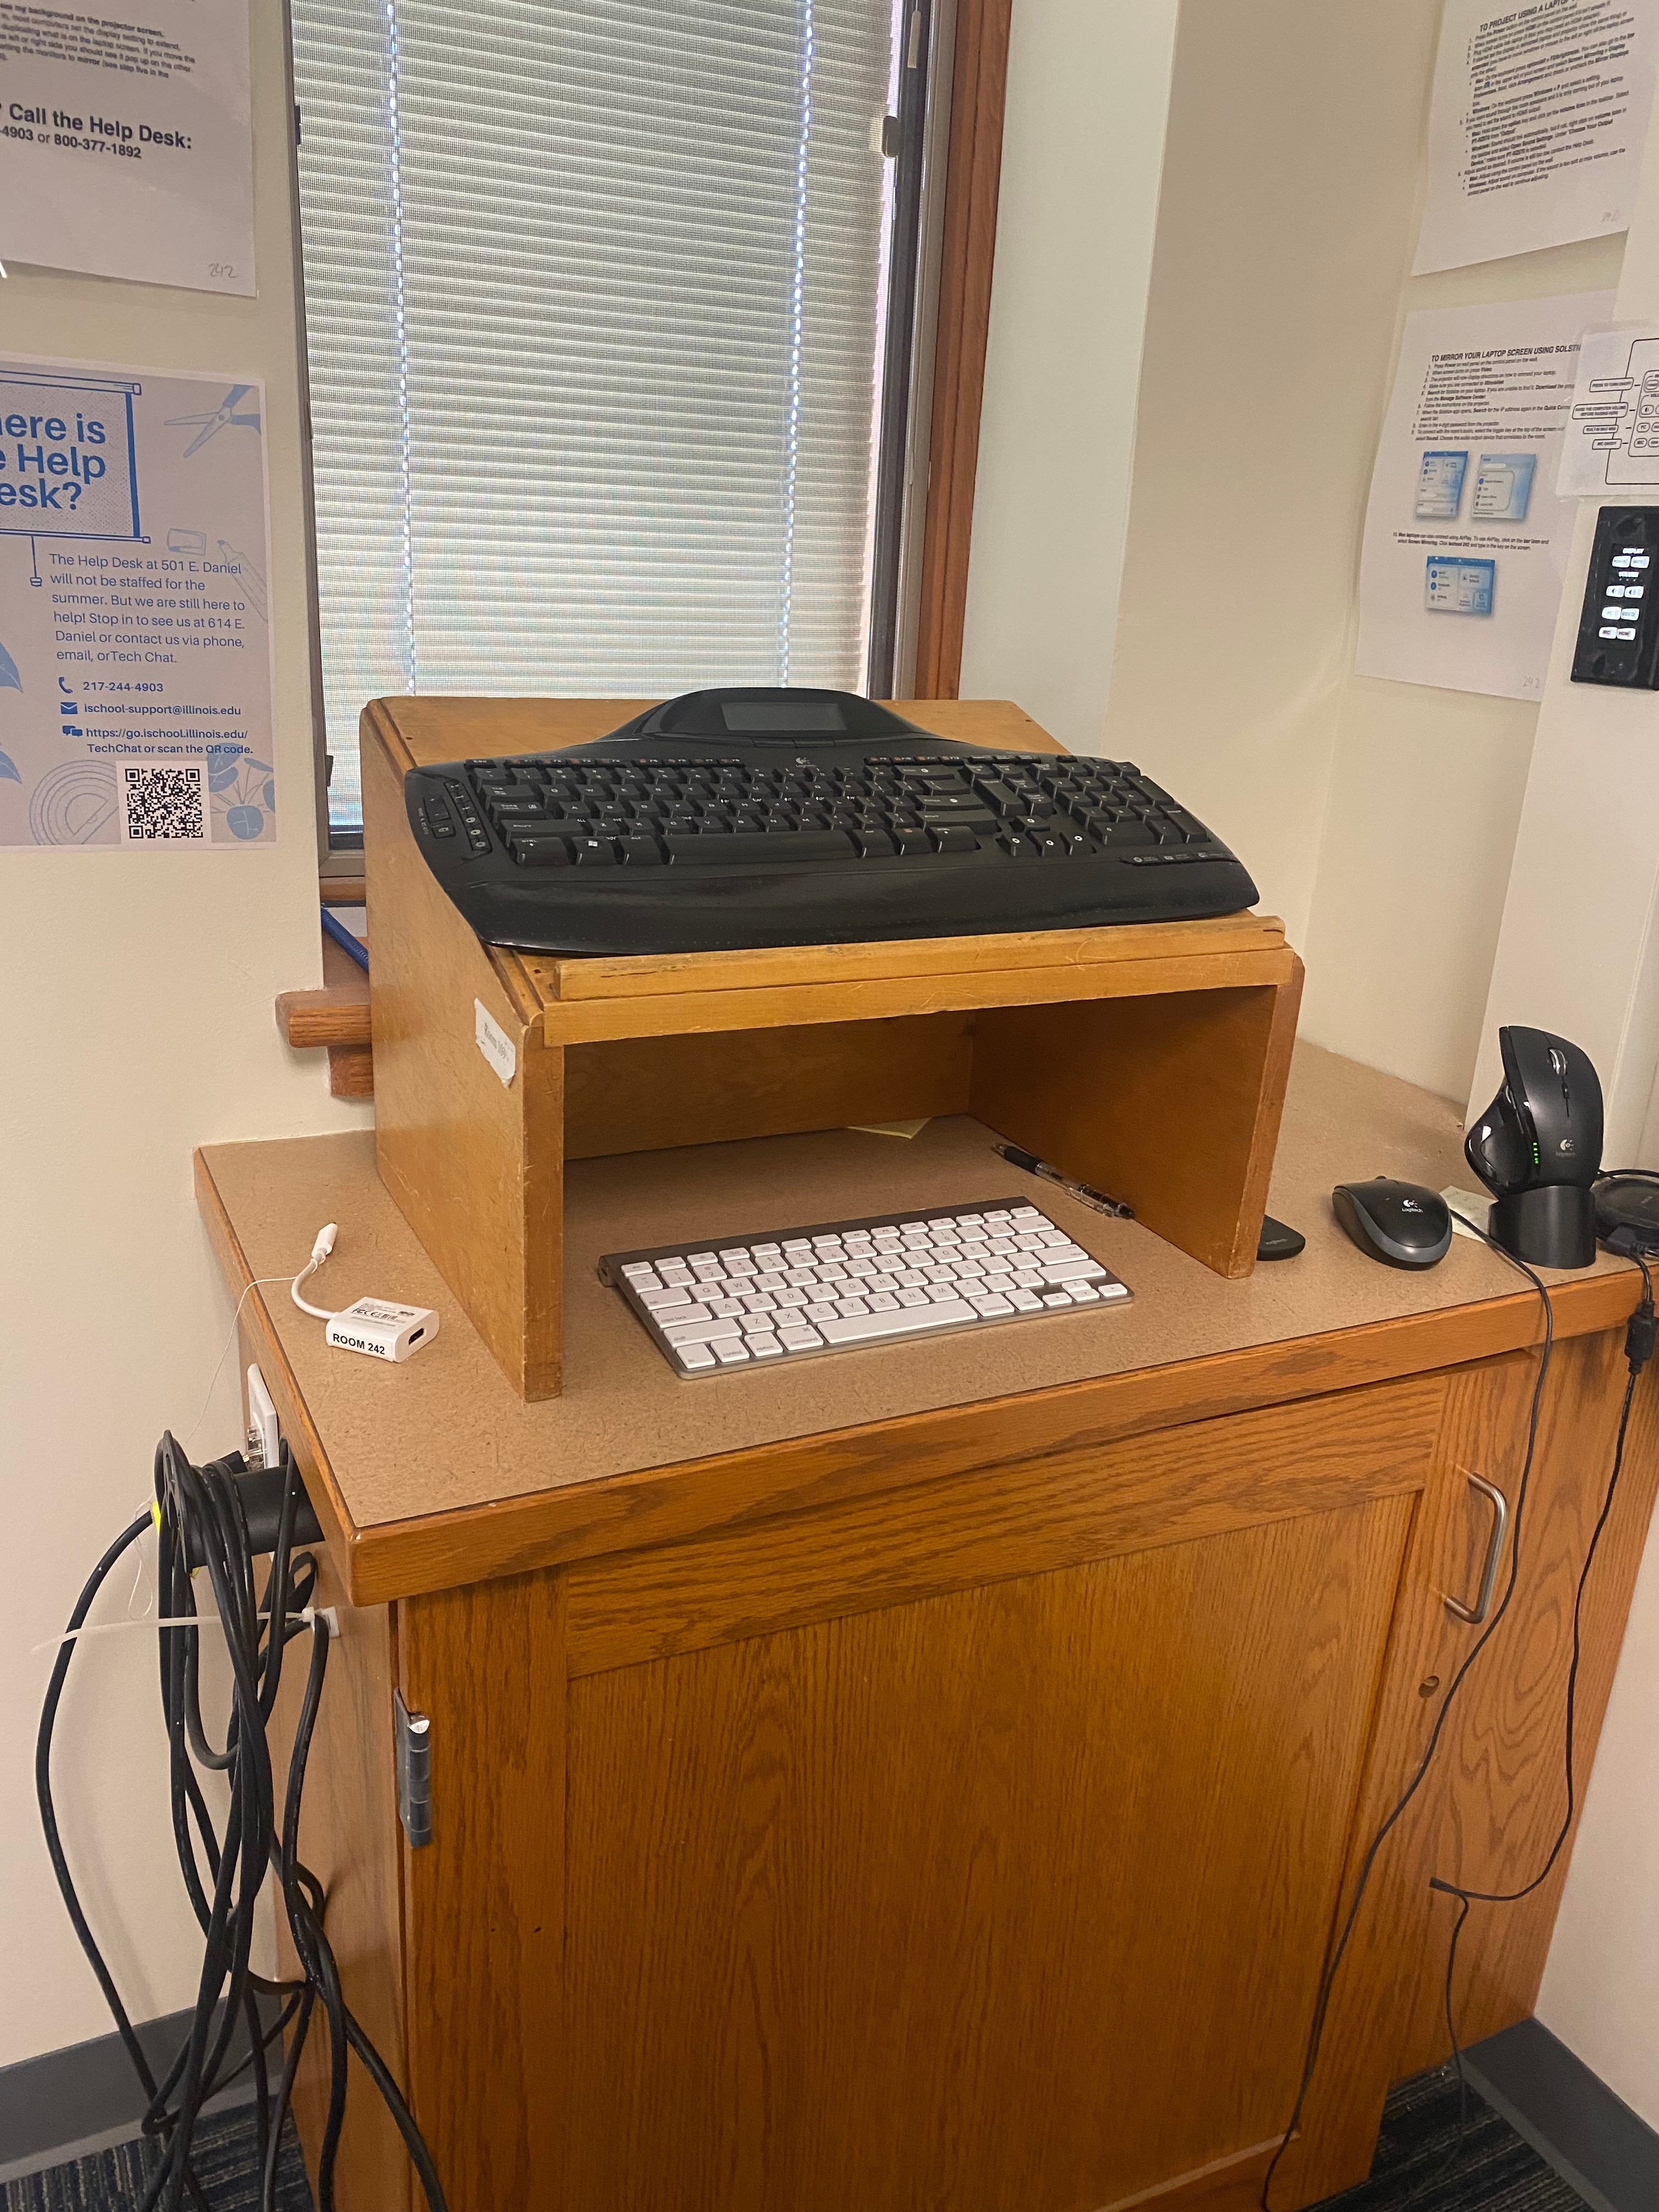
2. View of the presenter's corner and its AV equipment
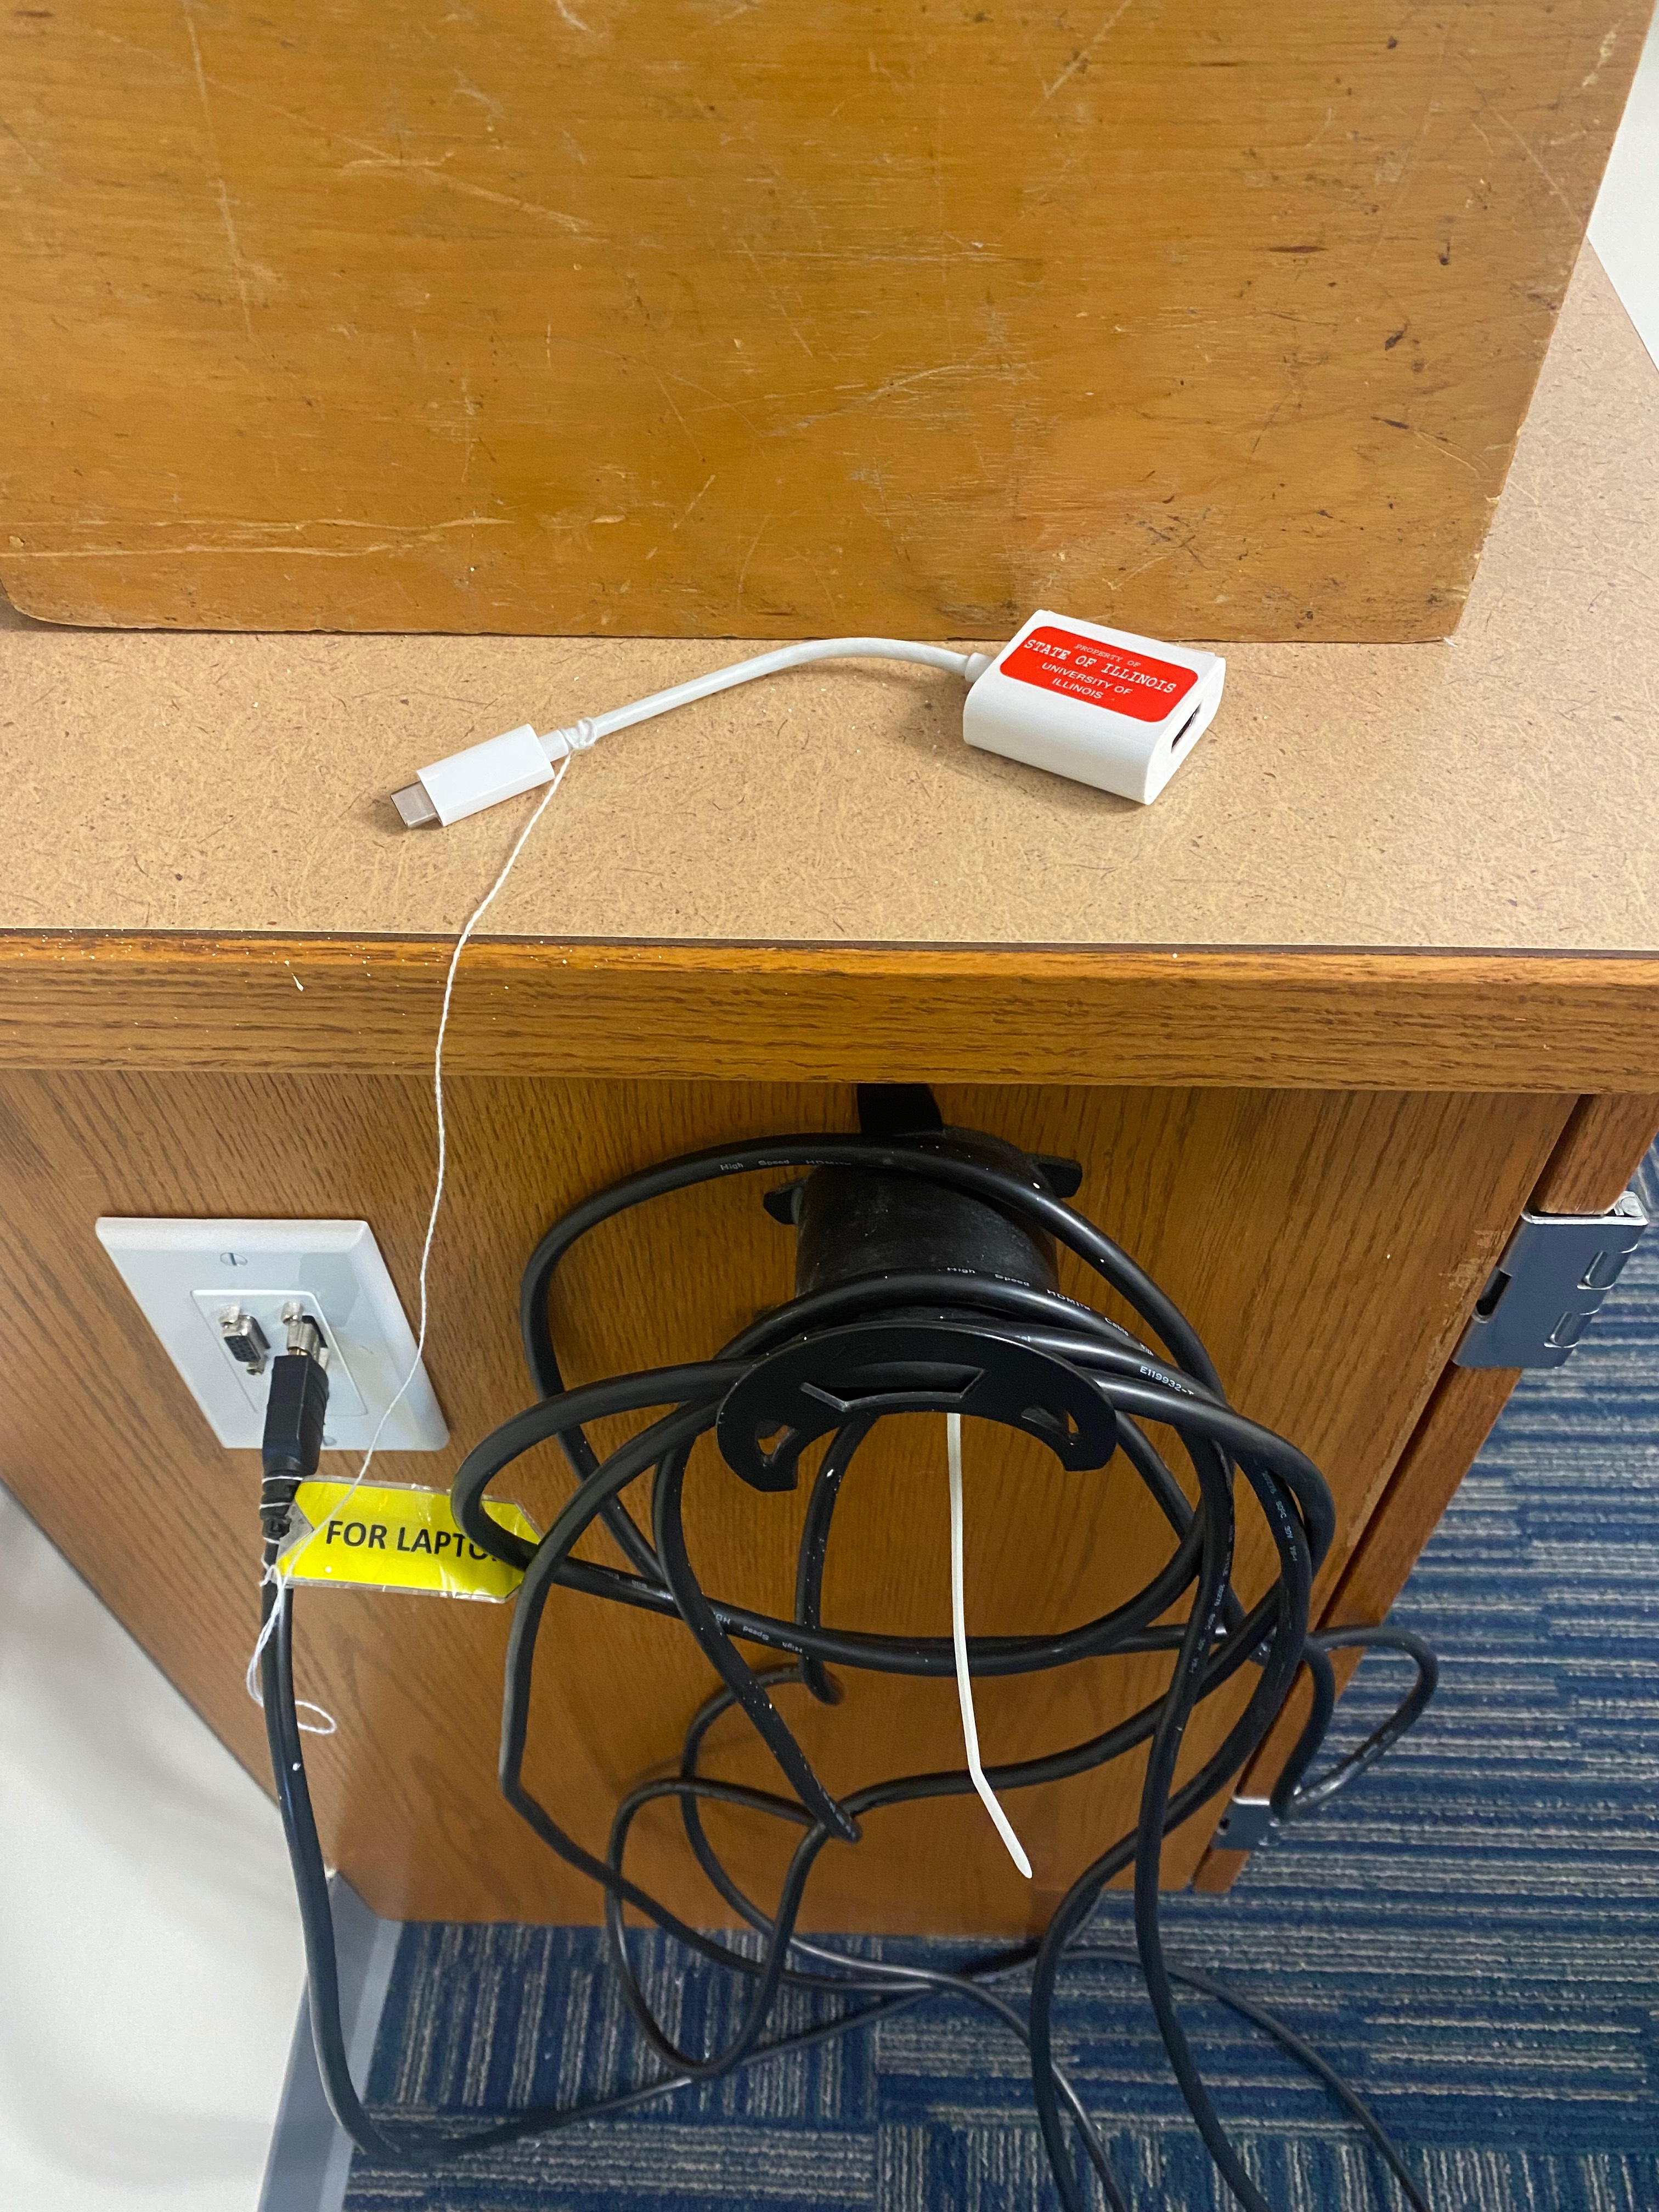
3. HDMI cable and adapter dongle for displaying from laptop
4. Wall console to control Room 242 display input and A/V
[Doc 133284 content is unavailable at this time.]