
Windows 11, Managed Upgrade Walkthrough
Pre-Upgrade Preparation
Confirm your Gies provided laptop, or desktop, is plugged into its charger or docking station (whichever applies).

If your device is on campus, confirm you are connected to Illinois Net or that your device, or its related dock, is connected to a wired Ethernet cable.
If your device is off campus, confirm your device or its related dock, is connected to either: your home WiFi or a wired Ethernet cable.

VPN (Off-campus only)
Lastly, if your device is located off-campus when the upgrade will occur for your department, please ensure that it is successfully connected to the VPN.
When connecting to the VPN, please select “Tunnel All.”

For reference and assistance with confirming a VPN connection, please refer to the following Knowledge Base articles:
Cisco VPN, Start Before Logon, How to connect before Windows login
IMPORTANT: Once the upgrade is completed, please re-connect to the Cisco VPN either before you login or once you have signed back into your account.
Sleep Settings
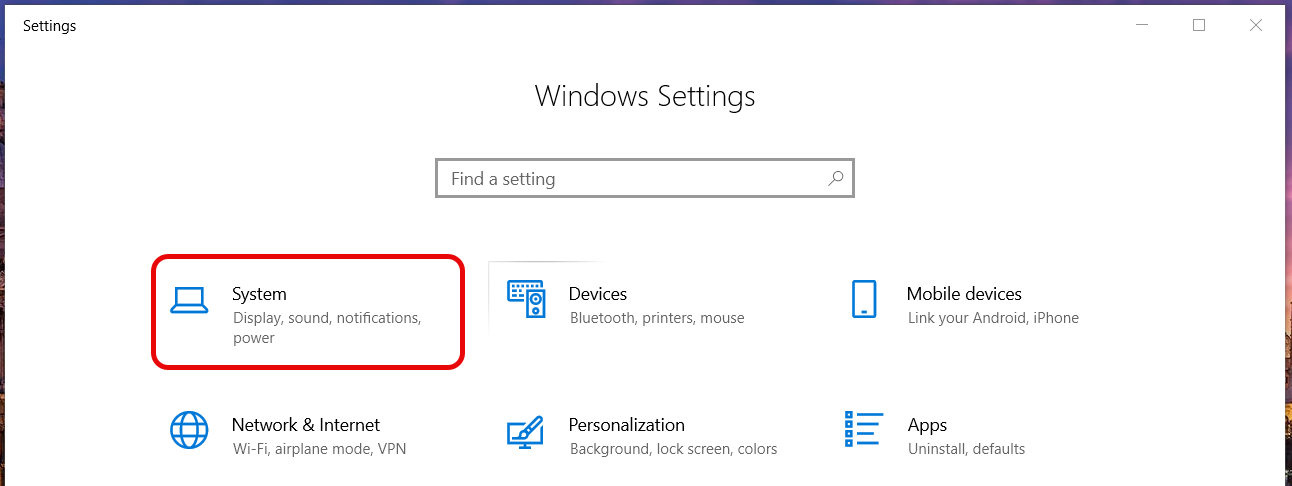
After signing into your Windows account, press the “Windows” key plus the “I” key on your keyboard to open the Settings menu.
Alternatively, select the Windows icon and then select the "Gear" icon to open the Settings menu.

In the new window, select “System”.
In the following menu, select “Power & Sleep.”
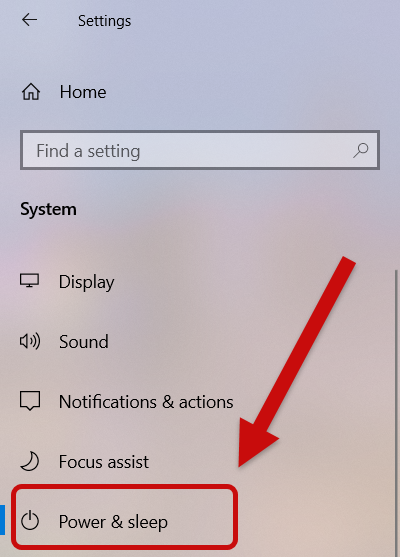
After the “Power & Sleep” menu is visible, review the “Sleep” options. Change the option that reads “When plugged in, PC goes to sleep after.”
Change the drop-down menu value for this setting to “Never.”

Software Center Settings
Locate the Windows search box at the bottom left of your screen, or select the magnifying lens icon, and type “Software Center.” Select “Open.”

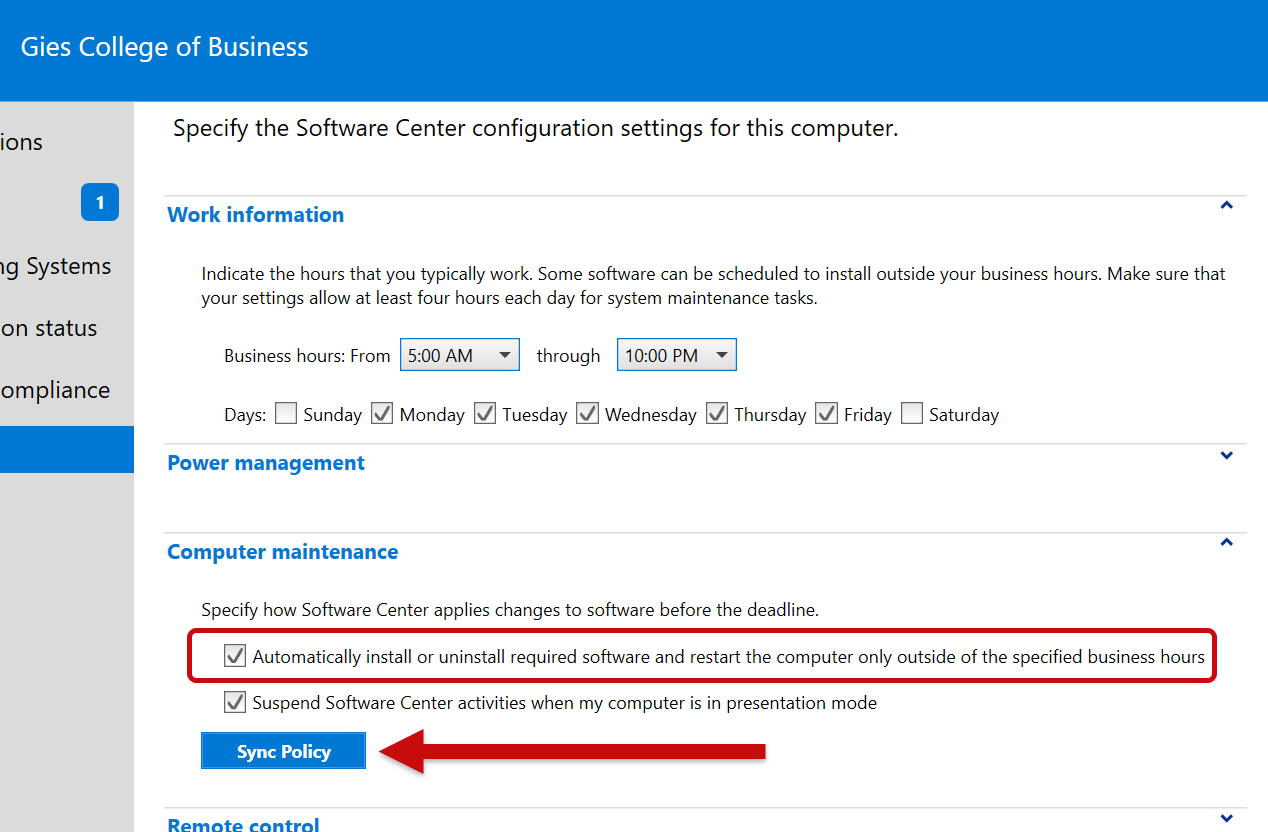
Once Software Center loads, select “Options” on the left side of the window.

In the “Options” menu, hover your cursor over “Computer Maintenance” and select it. Several options should appear. Confirm that the top option, “Automatically install or uninstall required software and…”, is checked.
If it is not, check its box and then select the button that reads “Sync Policy.”
Software Center Updates
Open Software Center and locate the “Updates” option on the left.

If you notice any pending updates, such as the ones shown in the following image, allow them to download and install.

If any updates show that a restart is necessary to complete its installation, confirm you have an hour or two available. If possible, do this restart near the end of the day.

That’s it! Your device is now ready to receive the Windows 11 upgrade. Remember: Please keep your device plugged in, connected to the internet, and turned on to make sure no interruptions occur during this upgrade.