Topics Map > Communication and collaboration > Lync / Skype for Business
Topics Map > Communication and collaboration > Office 365
Teams, Voicemail Messages, Greetings, and Settings
This document covers how to check your Teams voicemail, change your greeting, and change voicemail options.
Voicemail messages left for you on your Teams account are stored in your Exchange mailbox. You can listen to your voicemail messages from Outlook and Microsoft Teams.
Table of Contents:
Missed call and voicemail notifications
When you receive a voicemail, a notification will alert you in Teams and Outlook. If the caller hangs-up before leaving a message, you will receive a Missed-Call Notification message with the caller information (if it was not blocked).
Listen to your voicemail in Outlook
Voicemail messages will be delivered to your Exchange mailbox as an audio file along with a text transcript of the message. Using the Outlook desktop application or Outlook Web Access (https://outlook.office.com), you can listen to the audio file through you computer's audio device by double-clicking on it.

Listen to your voicemail in Microsoft Teams
Because Cloud Voicemail is fully integrated into Office 365, you can listen to your voicemail messages using the Teams desktop, web, or mobile applications.
Please note, these instructions are for New Teams. If you still have Classic Teams, please reach out to your local IT support for assistance in upgrading.
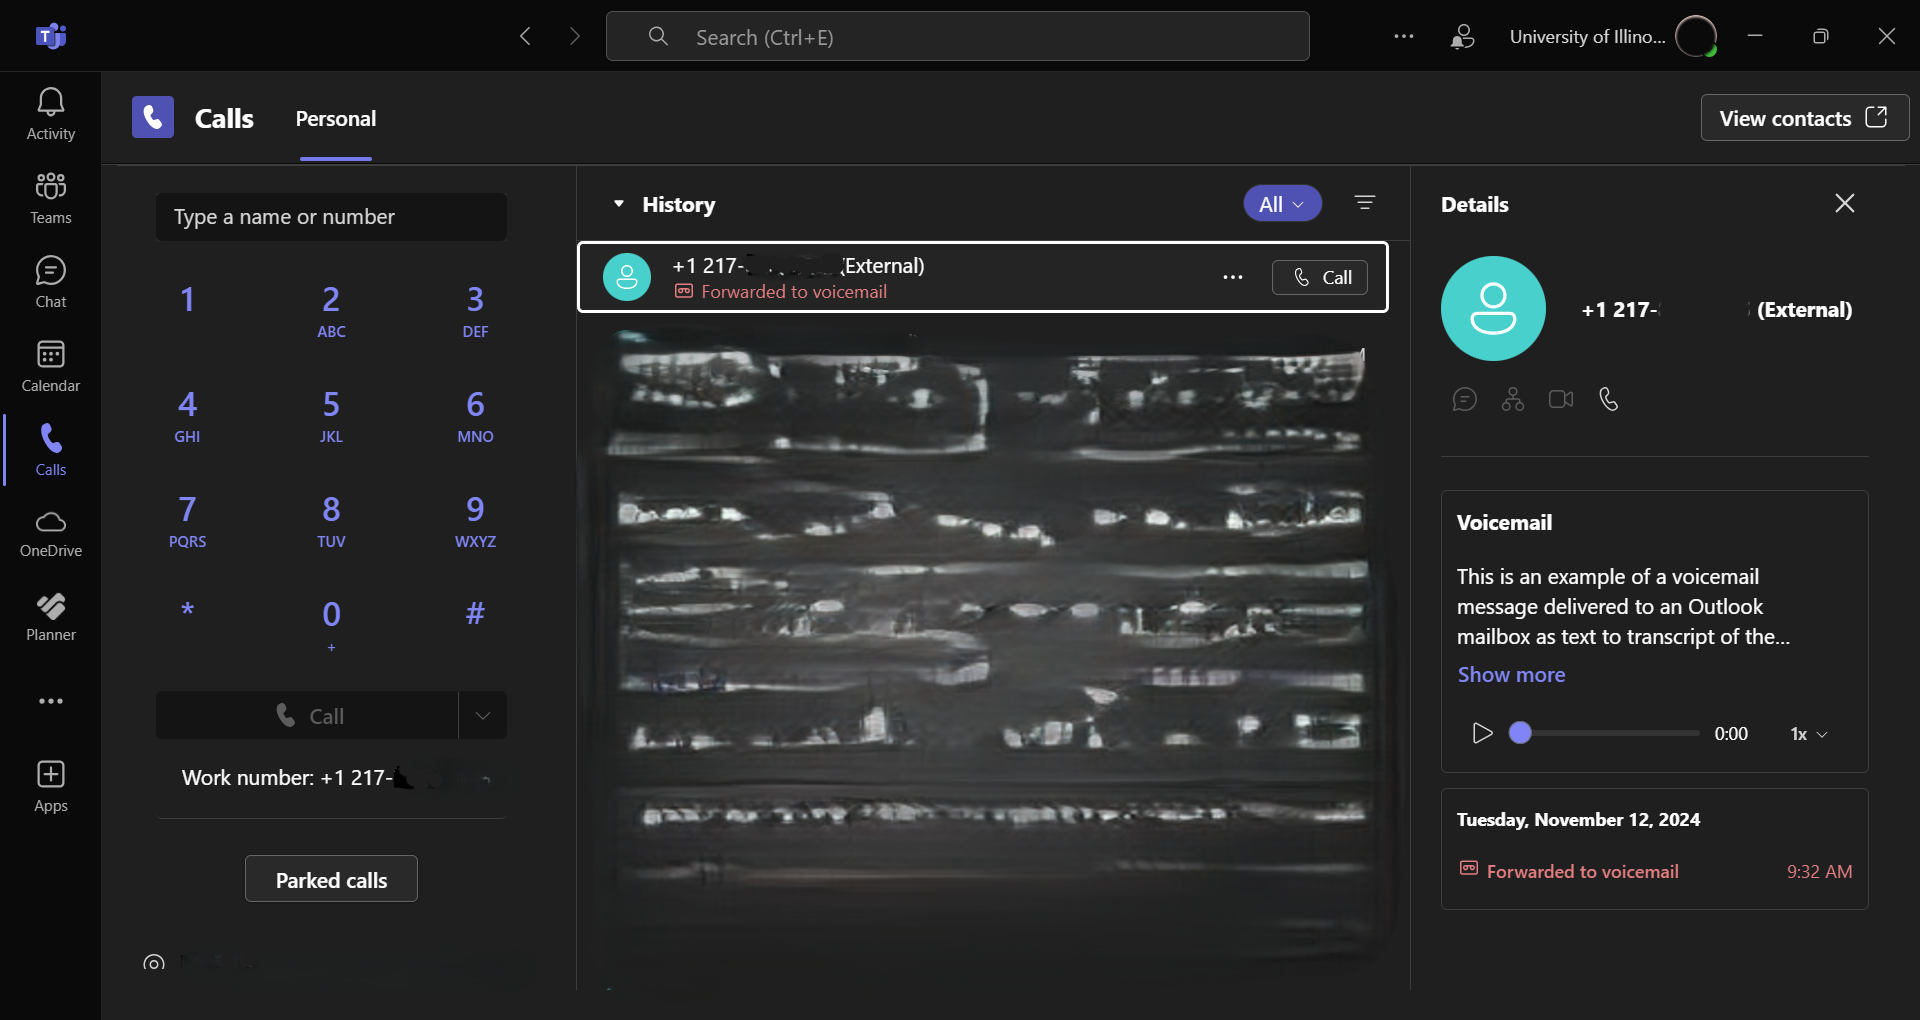
- Click on the Calls application on the left side of the Teams screen and then click on the voicemail in your calls list. In the voicemail window, click on the arrow button to play the message.

- Click on the 3 dots to the right of the voicemail for message options, such as marking the message as unread or to delete the message. Note: If you delete the message from Teams, it will also be delete from Outlook, and vice-versa.
Change your voicemail greeting and settings using Microsoft Teams
You can use Microsoft Teams to change your voicemail greeting and settings such as basic call answer rules and out off office greeting options:
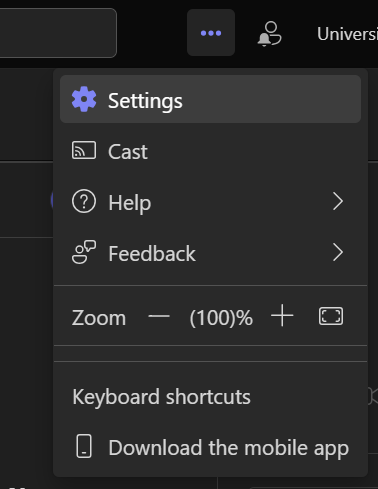
- Click on the ellipses (...) at the top of the application and choose Settings from the drop-down menu.
- Once you are in the Teams Settings screen, click on Calls.
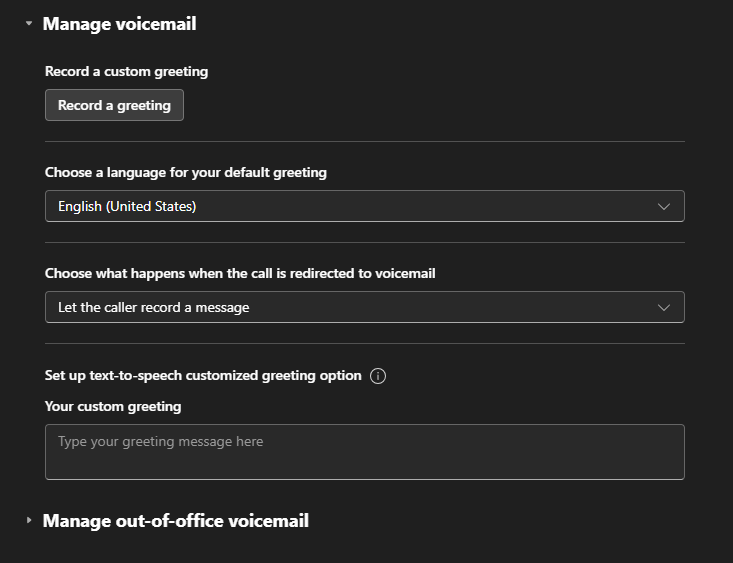
- Click on the Manage voicemail drop down, if it is not already expanded, to get to the screen when you can modify your voicemail greetings and settings.
- On the voicemail settings screen click the "Record a greeting" button to change your voicemail greeting. Your computer will call the voicemail system. Follow the audio prompts to update your greetings.
- The voicemail settings you can modify are:
- Change your Call Answering Rules: You can change what options your callers have when they reach the voicemail service; get disconnected, hear your greeting, record a message, choose to be transferred to the number or user you select.
- Change your prompt language: This is the prompt language that is played to callers. For list of supported languages, see Languages for voicemail greetings and messages.
- Configure your Out of Office greeting: This is the customized greeting message that is played to callers when your status is Out of Office. This option can be activated "Always," when you have an active "Auto Reply" in Outlook, or whenever you have an out-of-office calendar appointment.
Change your voicemail settings using the Cloud Voicemail Portal
Voicemail settings can be managed using the Microsoft Cloud Voicemail web portal.
From any standard web browser, go to https://go.illinois.edu/vmsettings or https://aka.ms/vmsettings.
On the Voicemail settings page, you can configure the following settings:

- Change your Call Answering Rules: You can change what options your callers have when they reach the voicemail service; get disconnected, hear your greeting, record a message, choose to be transferred to the number or user you select.
- Change your prompt language: This is the prompt language that is played to callers. For list of supported languages, see Languages for voicemail greetings and messages from Skype for Business.
- Configure your Out of Office greeting: This is the customized greeting message that is played to callers when your status is Out of Office. This option can be activated "Always," when you have an active "Auto Reply" in Outlook, or whenever you have an out-of-office calendar appointment.
Be sure to click the Save button at the top of the screen after making changes.


