

VPN, CISCO Secure Client, Installation Instructions for macOS
University of Illinois students, faculty, and staff should follow these instructions to install the Cisco Secure Client on their macOS computer.
The Cisco Secure Client can be used to connect to the campus Virtual Private Network (VPN).
Installing the client requires administrator credentials. Faculty and staff that use a university-owned computer may have to contact their IT support unit to install this software on their behalf.
Quick Start
- Download the macOS VPN installation package from the WebStore.
- Extract the downloaded file by double-clicking on it.
- It should be named something like "cisco-secure-client-macos-###-personal-installer.dmg".
- The file will most likely be in your Downloads folder.
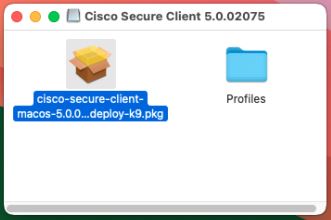
- Double-click on the installer to start the installation dialog. The installer file is the one whose name begins with "cisco-secure-client".
- From System Settings, allow the Cisco Secure Client VPN Service to run in the background.
- From System Settings, enable the Cisco Secure Client Socket Filter extension. When alerted by macOS that the extension will filter network content, click "Allow".
- Start the Cisco Secure Client application.
- Select the profile that best suits your needs and click "Connect".
- Complete the authentication process using your full email address (NetID@illinois.edu) as your username.
Detailed instructions are provided below.
Installing the Cisco Secure Client
- Download the macOS VPN installation package from the WebStore. The downloaded file should be named something like "cisco-secure-client-macos-###-personal-installer.dmg" and will most likely be in your Downloads folder.
- Extract the downloaded file by double-clicking on it. It should be named something like "cisco-secure-client-macos-###-personal-installer.dmg"
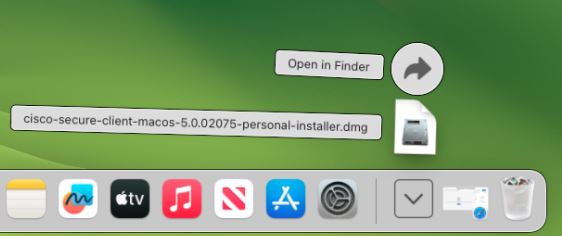
- Double-click on the installer to start the installation dialog.
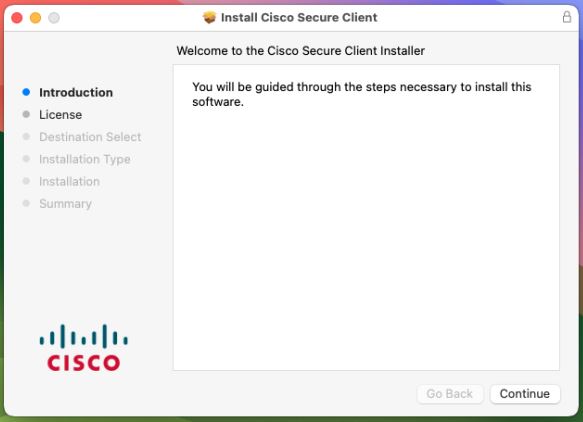
- On the installer welcome screen, click "Continue".
- Accept the End User License Agreement by clicking "Continue".
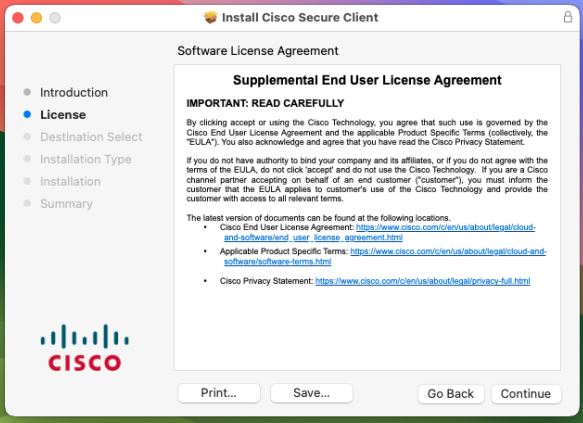
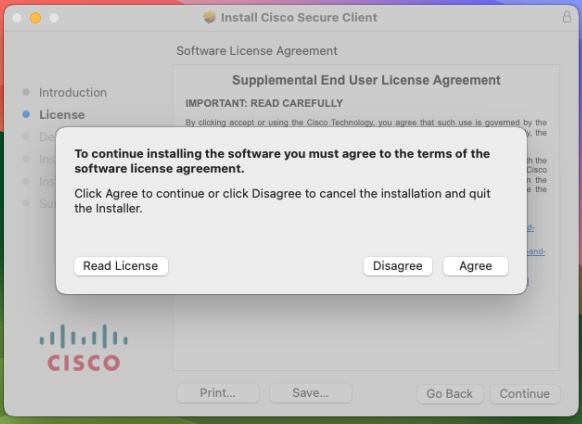
- In the new foregrounded window, confirm that you accept the End User License Agreement by clicking "Agree".
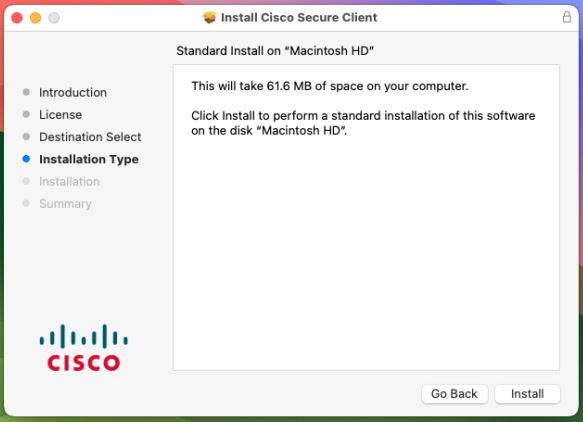
- In the next window, click "Install".
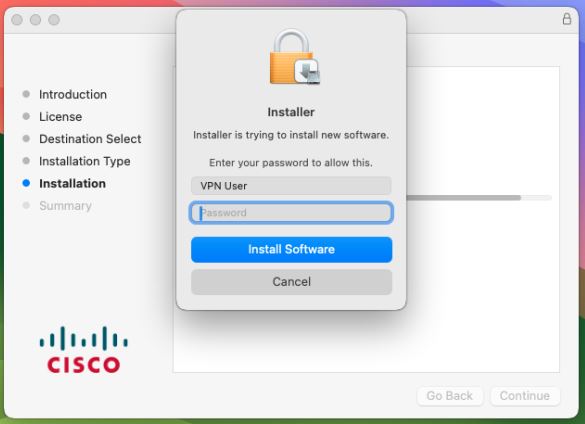
- If you are prompted for administrator credentials, enter them and click "Install Software". These are your computer credentials, which might not necessarily be your NetID and password.
- When the installer finishes, click "Close".
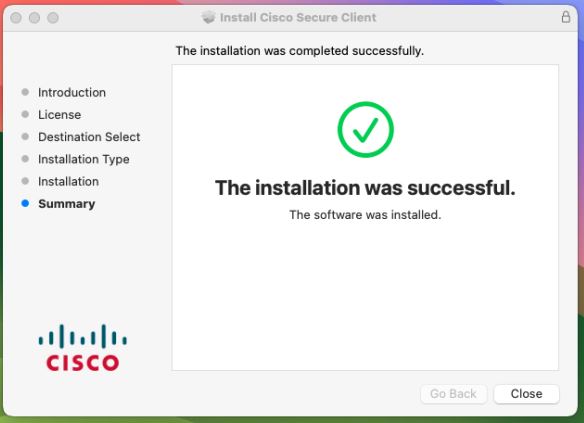
- At his point, the Cisco Secure Client has been installed. You will next be prompted to approve two items with your System Settings:
- Allow the Cisco Secure Client VPN service to run in the background.
- Enable the Cisco Secure Client - Socket Filter extension.
To approve these two items, go to System Settings → General → Login Items & Extensions.
Within the section called "App Background Activity", set the slider button for "Cisco Secure Client - AnyConnect VPN Service" to "on".

Within the section called Extensions, you should see and entry for the "Cisco Secure Client - Socket Filter". Click on the 🛈 symbol to the right of that entry.
Set the slider button for "Cisco Secure Client - Socket Filter Extensions" to "on". If you are prompted for administrator credentials, please enter them and click "OK". These are your computer credentials, which might not necessarily be your NetID and password.

When prompted to allow the extension to filter network content, click on "Allow".

Starting the Cisco Secure Client
Before you can connect to the VPN, you first need to start the Cisco Secure Client application.
Click on the Spotlight Search magnifying glass in the upper right-hand corner. In the foregrounded text box, type "Cisco Secure Client". You should see an application with than name appear in the search results.
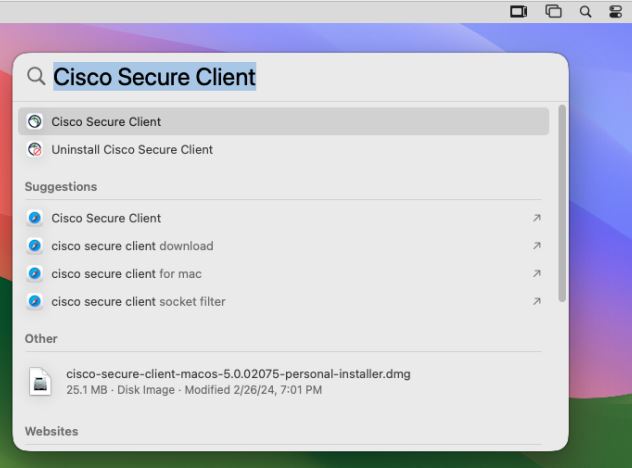
Click on the application to start it and you should be presented with the Cisco Secure Client connection window.
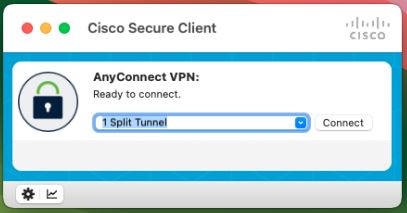
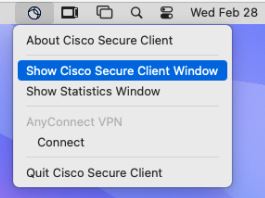
Starting the Cisco Secure Client will also add a new icon to your dock and to your menu bar.

Connecting to the VPN
If the VPN connection window is already open, you should see a drop-down menu with at least three options.
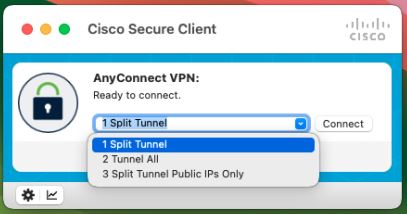
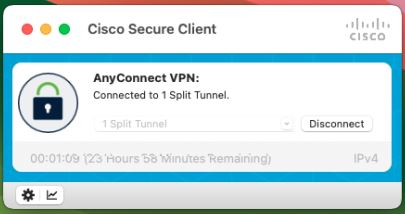
If you only see a text box that says "1 Split Tunnel", click on the downward-pointing arrow on the right side of that text box to show the other options.
If the VPN connection window is not already open, click on the Cisco Secure Client icon in the dock or in the menu bar and select "Show Cisco Secure Client Window". That should bring up the connection window.
From the drop-down menu, select the VPN connection profile that best suits your needs.
- If your only goal is to access campus resources, select the "Split Tunnel" profile.
- If your goal is to access off-campus resources as if you are on-campus, select the "Tunnel All" profile. This will also allow you to access campus resources.
- If your goal is to access campus resources, but you are at a location that uses the same private IP space as Illinois, select the "Split Tunnel Public IPs Only" profile. (If you are not sure what this means, you can safely ignore this profile option.)
- If you are unsure which profile to choose, select the "Tunnel All" profile.
- Additional guidance about VPN connection profiles is available here: About VPN Profiles
After you select a profile, you will be taken through the authentication process. Make sure you enter your full email address (NetID@illinois.edu) as your username.
If you do not see any options in the drop-down menu...
If you do not see any options in the drop-down menu, type connect.vpn.illinois.edu into the text box and then click "Connect".


Doing this with take you through the authentication process and connect you to the VPN using the "Tunnel All" profile. It will also download a configuration file onto your computer so that the profile options will be pro-populated the next time you connect to the VPN.
Disconnecting from the VPN
To disconnect from the VPN, click on the Cisco Secure Client icon in the menu bar and select "Disconnect".
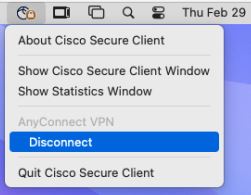
You can also disconnect by clicking on the "Disconnect" button on the right-side of the connection window.
Troubleshooting and the Statistics Window
If you encounter problems using the Cisco Secure Client, contact the Technology Services IT Service Desk.
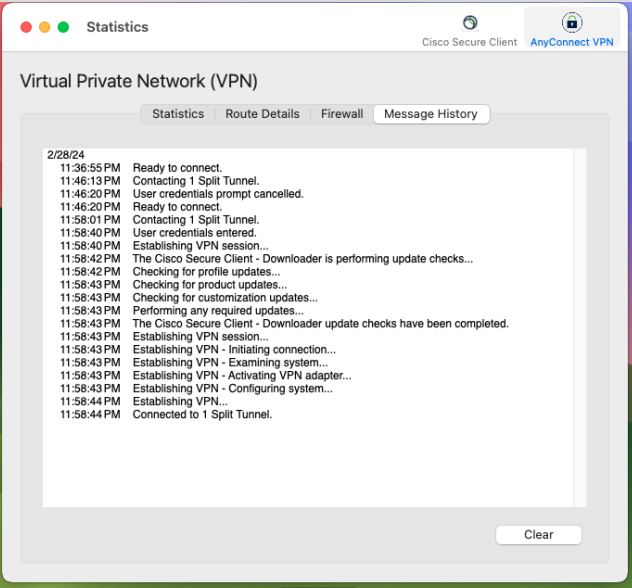
The Cisco Secure Client gathers information that can help with troubleshooting. To examine that information, click on the graph icon in the bottom left of the connection window and then choose among the tabs as needed.

Video
The video below shows how to install the Cisco Secure Client and how to connect to the VPN.
Note: the information in the video is somewhat out of date, so only use the video as a guide and follow the steps above for more exact instructions.